


RealPresence Collaboration Server (RMX) 1500/1800/2000/4000 Administrator’s Guide
Polycom®, Inc. 455
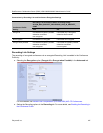
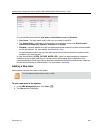
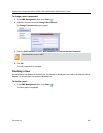
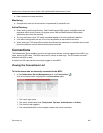
3 Click New User ( ), or right-click anywhere in the pane and then click New User.
The User Properties dialog box opens.
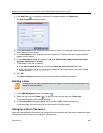
4 In the User Name text box, enter the name of the new user. This is the login name used by the user
when logging into the system.
5 In the Password text box, enter the new user’s password. This will be the user’s password when
logging into the system.
6 In the Authorization Level list, select the user type: Administrator, Administrator Read-Only,
Operator, Chairperson or Auditor.
7 To associate a user with a machine:
a In the User Properties dialog box, select the Associate with a machine check box.
b Enter the FQDN of the server that hosts the application who’s application-user name is being
added. Example: cma1.polycom.com
8 Click OK.
The User Properties dialog box closes and the new user is added to the system.
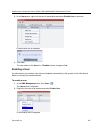
Deleting a User
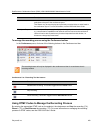
1 In the RMX Management pane, click Users ().
2 Select the user and click Delete ( ), or right-click the user and then click Delete User.
The system displays a confirmation message.
3 In the confirmation dialog box, select Yes to confirm or No to cancel the operation.
If you select Yes, the user name and icon are removed from the system.
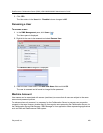
Changing a User’s Password
Users with Administrator authorization can change their own password and other users’ passwords. Users
with Operator authorization can change their own password.
To delete a user, you must have Administrator authorization. The last remaining Administrator in the
Users list cannot be deleted.