5-4
Using Print Mark to Print Photos
L
Proof Sign-off:
BLE H.Kato E.Omori
F.Fujimori
SEI M.Kauppi
R4C4410
Rev. C
A5 size MARK.FM
2/11/00 Pass 3
12. Press the
+
button to select
None
,
Selected
, or
All
.
13. When you select
Selected
or
All
, press the
ISO
or
W.B.
button to select the number of index copies.
You can specify up to 99 copies of the index.
14. Press
BACK
to return to the previous screen.
15. Press
Save
to show the confirmation screen.
16. Press the
W.B.
button to save your settings; the
screen changes to the main menu of the Print
Mark program.
If you want to change the current settings, press
BACK
to return to the previous screen. You can
change the settings in the same way as you did
with
Add Index
and
Select Image
.
17. Press
Exit
to return to the program selection menu.
Printing an index of photos
You can print photos in an index (several per sheet)
layout. Follow these steps to make a new DPOF file.
1. Turn your camera’s dial switch to .
2. Press
PrintMark
. The Print Mark program’s main
menu appears on the monitor.
3. Press
New settings
.
Note:
If a previous DPOF file exists, a message appears to
confirm if you want to delete it. Press
Done
to
continue or
Cancel
to quit.
4. Press the
-
button to select a several-per-sheet
layout.
5. Press the
+
button to select
All
or
Selected
.
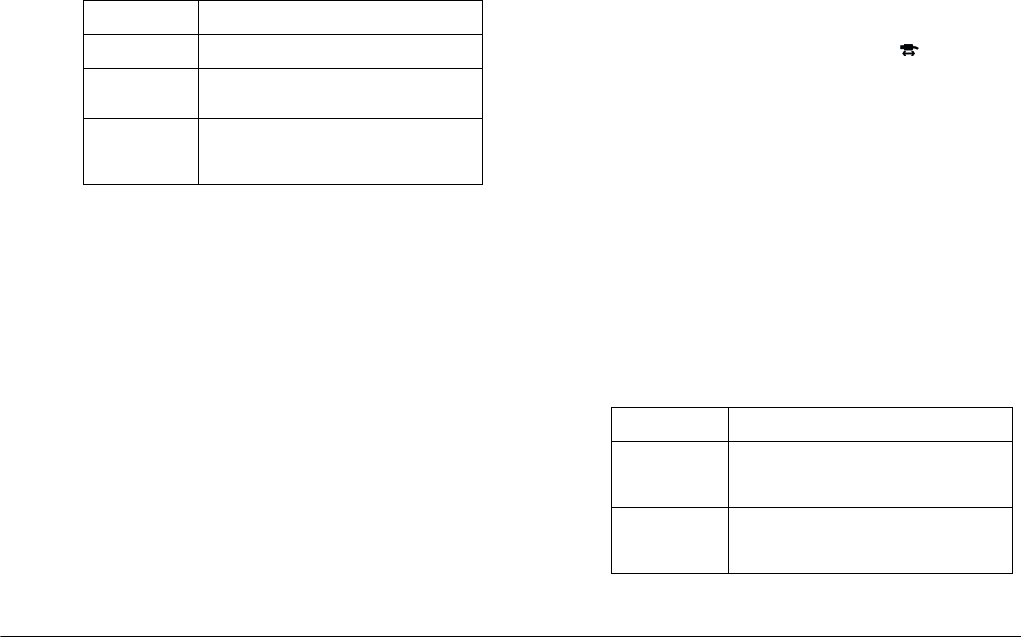
Button Result
None No index sheet is printed.
Selected The index sheets of the selected
photos are printed.
All The index sheets of all photos in the
memory card are printed regardless
of your selection.
Button Result
All The index sheets of all photos in the
memory card are printed. Skip to
step 12.
Selected The index sheets of the selected
photos are printed. Proceed to the
next step.


