


13
Using EPSON Paper
EPSON offers a wide variety of papers that let you customize your projects and achieve
professional results. This chapter gives you guidelines on:
■ “Choosing the Paper for Your Project” below
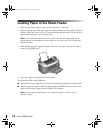
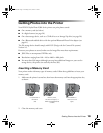
■ “Loading Paper in the Sheet Feeder” on page 14
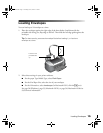
■ “Loading Envelopes” on page 15
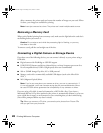
■ “Storing Your Photos” on page 16
Note: For instructions on loading printable CDs and DVDs, see page 36
(stand-alone printing) or page 70 (printing from a computer).
Choosing the Paper for Your Project
Once you know which photos you want to print, you need to select the type of paper to print
them on, the paper size, and your layout. Here are some helpful tips:
■ Select a type of paper to suit your image. For best quality, use one of the special EPSON
papers listed on the inside back cover.
■ Use the EPSON paper and ink designed for your printer. If you use incompatible paper,
you may not get the results you expect.
■ Select a paper size and layout to get the photos you want. When the printer is used in
Advanced stand-alone mode (without connecting it to a computer), it automatically
resizes your photos to fit the layout you choose—from letter-size to 4 × 6-inch paper. (In
Basic stand-alone mode, you can print on 4 × 6 Premium Glossy Photo Paper only.)
Note: You must print borderless on supported types and sizes of paper:
see page 62 for a list. Stand-alone mode supports the paper types listed on
page 27.
To order EPSON paper, contact your dealer, call the EPSON Store
SM
at (800) 873-7766, or
visit our web site at www.epsonstore.com (U.S. sales only). In Canada, please call
(800) 463-7766 for dealer referral.
Pbasics.book Page 13 Tuesday, June 1, 2004 1:31 PM