20 Printing Without a Computer
After a moment, the printer reads and counts the number of images on your card. When
it’s done, your images are available for printing.
Note: Insert just one card at a time. The printer can’t read multiple cards at once.
Removing a Memory Card
When you’re finished printing from a memory card, make sure the light below the card slot is
not flashing before you remove it.
Caution: Do not eject a card while the processing light is flashing, or you may
lose data on the card.
To remove a card, pull the card straight out of the slot.
Connecting a Digital Camera or Storage Device
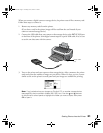
If you have one of the following devices, you can connect it directly to your printer using a
USB cable:
■ Digital camera with PictBridge or USB DP support
■ USB CD/DVD burners and drives (selected drives: see http://support.epson.com for a
list of compatible drives) USB 2.0 (high-speed) drives are recommended
■ 100 or 250MB Iomega Zip drive, AC or USB powered
■ Memory cards with a commercially available USB adapter (such as the MicroTech
ZiO!
™
).
■ MO (Magneto-Optical) drives
Note: If you’re not sure about your camera or drive, you can try connecting it. If
it’s not compatible, you’ll see a screen saying that the connected device cannot
be used. EPSON cannot guarantee the compatibility of any cameras or drives.
If you are using a Zip disk, it must be formatted as a FAT16 disk. Also, if you insert a
Macintosh disk into a Zip drive attached to the printer, it automatically formats it, so be sure
to use a disk that is empty or not formatted, or one containing data you don’t mind losing.
(You will be prompted before any data is erased.)
Tip: When you connect a CD-drive, you can also print photos from Picture CDs
that you get from your photo lab.
Pbasics.book Page 20 Tuesday, June 1, 2004 1:31 PM


