


Printing On CDs or DVDs 77
Adjusting the Print Density
If ink smears on your printed CDs or DVDs, you may need to adjust the color saturation or
ink density. CDs from different manufacturers may absorb ink differently, so you may need to
adjust the density for each type of disc. Follow these instructions to print a color saturation
check pattern, and then make adjustments as necessary.
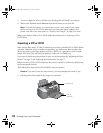
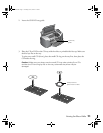
1. Insert a test CD or DVD for printing, as described on page 70.
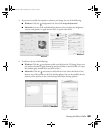
2. Start EPSON Print CD.
3. Follow the instructions in “Printing Your Design” on page 72 to make sure your EPSON
Stylus Photo R300 Series printer is selected, the Paper Size is set to
A4, and the Paper
Source is set to
Manual (Windows) or Manual Feed (Mac OS 9).
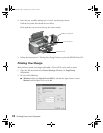
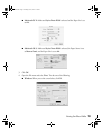
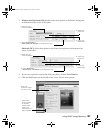
4. Select
Print from the File menu.
5. In Windows or Mac OS 9, select
Print Density Confirmation (or Check) Pattern. In
Mac OS X, select
EPSON Print CD from the pop-up menu then choose Print Density
Confirmation
.
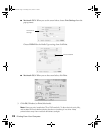
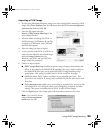
6. Click
OK (Windows) or Print (Macintosh).
7. After the pattern is printed, examine the print and make the
Print Color Correction (or
Color Correction) setting lighter or darker as necessary.
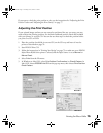
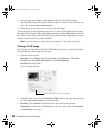
You can print three density patterns on one disc. Each pattern is printed in a different
location.
After the first pattern is printed, adjust the setting, then repeat steps 4 through 6,
selecting
Second or Second Time to print the second pattern.
If you want to try a third Color Correction setting, you can repeat steps 4 through 6 again
and select
Third or Third Time.
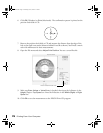
8. Remove the CD or DVD and let it dry for at least 24 hours. Then check the saturation
levels again.
You can also use the Brightness and Contrast settings in EPSON Print CD to adjust color
saturation. See “Designing CDs and DVDs” on page 68 for instructions.
Pbasics.book Page 77 Tuesday, June 1, 2004 1:31 PM