


Printing On CDs or DVDs 75
If you want to check the print position or color, see the instructions for “Adjusting the Print
Position” below and “Adjusting the Print Density” on page 77.
Adjusting the Print Position
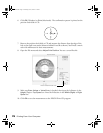
If your printed images and text are not centered or positioned the way you want, you may
need to adjust the printing position. Use the blank cardboard position check disk included
with your printer, or an extra CD. You can also use these steps to check the position before
you print on a CD or DVD:
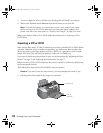
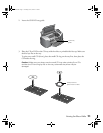
1. Place the position check disk (or an extra CD) on the CD tray and insert it into the
printer, as described on page 70.
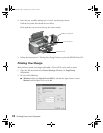
2. Start EPSON Print CD.
3. Follow the instructions in “Printing Your Design” on page 72 to make sure your EPSON
Stylus Photo R300 Series printer is selected, and the Paper Source is set to
Manual or
Manual Feed.
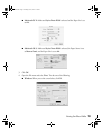
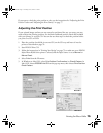
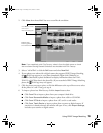
4. Select
Print from the File menu.
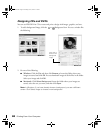
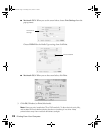
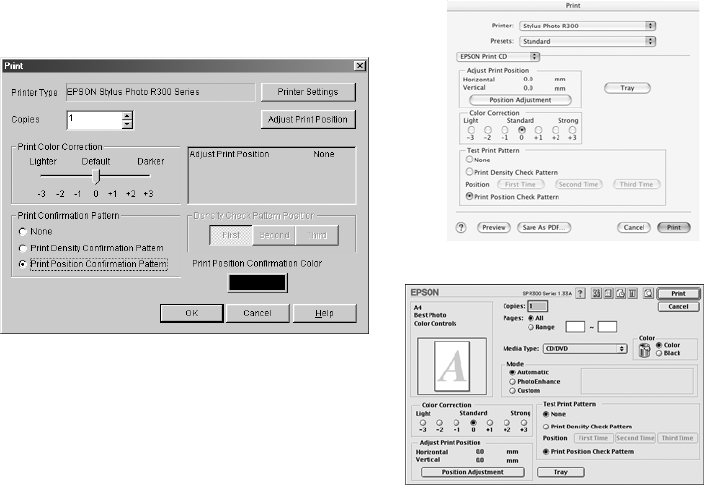
5. In Windows or Mac OS 9, select
Print Position Confirmation (or Check) Pattern. In
Mac OS X, choose
EPSON Print CD from the pop-up menu, then choose Print Position
Check Pattern
.
Mac OS X
Windows
Mac OS 9
Pbasics.book Page 75 Tuesday, June 1, 2004 1:31 PM