


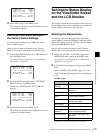


145
Adjustments and Settings from Menus
Chapter 5 Menu Displays and Detailed Settings
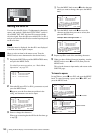
3
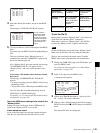
Turn the MENU knob to select the desired aspect ratio
(16:9/4:3), and press the MENU knob.
Setting the aspect ratio in HD mode
You can select the aspect ratio of video downconverted
from HD for output as SD.
(How to select an item in the menu screen: Turn the
MENU knob to move the b mark to the desired item.)
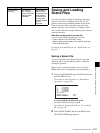
1
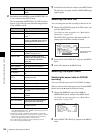
Display the OUTPUT page of the OPERATION
menu, and press the MENU knob.
2
Select HDtSD, and press the MENU knob.
3
Turn the MENU knob to select the desired aspect ratio
(16:9/4:3), and press the MENU knob.
The aspect ratio of HD-SDI output is always 16:9.
To display a “16:9” aspect ratio of on the
viewfinder screen
When the recording format is DVCAM and the aspect ratio
is 16:9, you can display the indication “16:9” on the
viewfinder screen by setting DISP 16:9 on the VF DISP 1
page of the OPERATION menu to ON.
For details, see “Selecting the Display Items” on page
137.
About the CCD Scan Mode
This unit allows you to record in progressive scan mode as
well as in interlace scan mode. You can select the scan
mode from the following modes using the FORMAT page
of the OPERATION menu.
• 60i (interlace scan) mode
• 30P (progressive scan) mode
• 23.98P mode
Pulldown method for DVCAM format recording in 23.98P mode
DVCAM video signals recorded in 23.98P mode are 2-3
pulled down, and recorded on a disc as 60i signals.
.
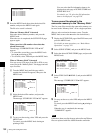
Note
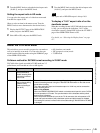
DF/NDF Purpose Notes
DF Obtain an effect similar
to that obtained by
23.98P shooting while
maintaining interlace
scan mode.
–
NDF Re-convert to 23.98P
with nonlinear editing
software (NLE).
(Select according to
your NLE.)
• There will be noise on the recorded image if you change the operating mode for the
internal timecode generator using the F-RUN/SET/R-RUN switch on the side control
panel while recording.
• The video and audio signal and timecode output via i.LINK may not be consecutive
when recording starts.
Notes on 2-3 pulldown
• When the PRESET/REGEN/CLOCK switch on the side control panel is set to CLOCK,
this unit operates in DF mode. The synchronization of the timecode and the pulled-
down picture is disabled.
• When drop-frame timecode is input via the TC IN connector, this unit operates in DF
mode and synchronization of the pulled-down picture and the timecode is disabled.
This setting will continue in effect until the timecode setting (F-RUN/R-RUN or DF/NDF)
is changed.