


66
Recording – Basic Operations
Chapter 3 Recording and Playback
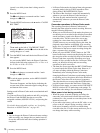
Recording a SHOT MARK 2
Press the RET button twice in quick succession during
recording or playback.
“ShotMark2” appears near the timecode display on the
viewfinder screen for about one second.
If SHOT MARK 2 recording has been assigned to one of
the ASSIGN switches, you can also use that switch to
record a SHOT MARK 2.
Setting the Thumbnail Image at
Recording Time
When you record a clip, you can specify which frame to
use as the clip’s thumbnail image (see page 78).
For example, if all clips have the same image in their first
frames, you can specify a frame a few seconds after the
start of the clip, so that all thumbnails will not show the
same image.
The factory default setting is to use the first frame in the
clip as the thumbnail.
Proceed as follows.
(How to select an item in the menu screen: Turn the
MENU knob to move the b mark to the desired item.)
1
Display the ESSENCE MARK page of the
MAINTENANCE menu, and press the MENU knob.
For details on menu operations, see “Basic Menu
Operations” on page 132.
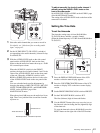
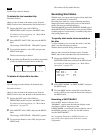
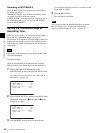
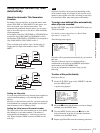
2
Select INDEX PIC. POS., and press the MENU knob.
The b mark changes to a z mark, and the z mark
changes to a ? mark.
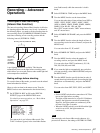
3
Turn the MENU knob to select the desired time.
You can select the time in units of 1 second over the
range 0SEC to 10SEC.
4
Press the MENU knob.
The selection is confirmed.
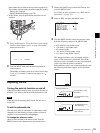
You can also change the thumbnail image at playback
time. For details, see “Switching the Information
Displayed in the Thumbnail Screen” on page 79.
Note
SHOT MARK 1 : ON
SHOT MARK 2 : ON
INDEX PIC. POS. : 0SEC
FIND MODE : R.ST
TOP M04 ESSENCE MARK
SHOT MARK 1 : ON
SHOT MARK 2 : ON
INDEX PIC. POS. :?5SEC
FIND MODE : R.ST
TOP M04 ESSENCE MARK
Note