


95
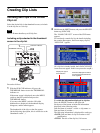
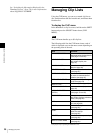
Editing Clip Lists
Chapter 4 Scene Selection
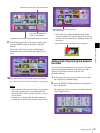
Each press switches the information displayed for clip
lists in the following order.
Date and time of creation
t Title t Clip list name
t Date and time of creation t ...
3
Select the desired clip list name, and press the button/
knob.
This saves the current clip list to disc.
To apply a desired title or name to a clip list
Use the supplied PDZ-1 Proxy Browsing Software.
For details, see the PDZ-1 online help.
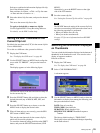
Setting the Start Timecode for the
Current Clip List
By default, the start timecode (LTC) for the current clip list
is set to 00:00:00:00.
To set this to a different value, proceed as follows.
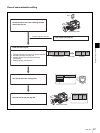
1
Display the CLIP menu.
See “To display the CLIP menu” on page 96.
2
Use the SEL/SET button or MENU knob to align the
cursor with “TC PRESET”, and press the button or
knob.
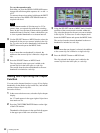
The display appears as in the following figure.
The timecode shown is the start timecode currently set
for the current clip list.
3
Press the SEL/SET button left and right to select the
desired time unit (any of HOUR, MIN, SEC, and
FRAME).
4
Press the SEL/SET button up or down, or turn the
MENU knob to display the desired value.
5
When all time units are set correctly, press the SEL/
SET button or MENU knob.
This sets the start timecode for the current clip list,
which will be used for playback.
To cancel the timecode setting, hold down the SHIFT
button, and press the SEL/SET button down (CLIP
MENU).
Alternatively, press the RESET button on the right
side of the LCD monitor.
6
Save the current clip list.
See “Saving the Current Clip List to Disc” on page 94.
The DF/NDF timecode setting of the current clip list is
set to the current setting of the camcorder when one of
the following operations is performed.
• When you add the first sub clip
• When you set the start timecode
See page 121 for more information about DF/NDF
settings.
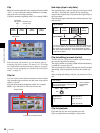
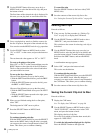
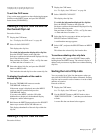
Switching the Information Displayed
on Thumbnails
You can switch the information displayed at the bottom of
thumbnails in the thumbnail screen. You can also select
display of sequence numbers.
Proceed as follows.
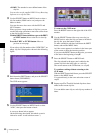
1
Display the CLIP menu.
See “To display the CLIP menu” on page 96.
2
Select “CLIP INFORMATION”.
A sub menu appears.
3
Use the SEL/SET button or MENU knob to select the
information to display from among the following, and
then press the button or knob.
DATE: Date of recording
TIME CODE: Start timecode
DURATION: Whole length of clip
SEQUENCE NUMBER: Thumbnail sequence
number
The factory default setting is “TIME CODE”.
The display below each thumbnail changes depending
on the item selected.
Note