


165
Maintenance
Appendix
For details, see “Selecting the Display Items” on
page 137.
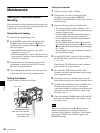
Testing the iris and zoom functions
1
Set the zoom to automatic zoom mode and check that
the power zoom operates correctly.
2
Set the zoom to manual zoom mode and check the
zoom functions manually. Turn the manual zoom lever
from the telephoto position to the wide-angle position
to check that the picture changes depending on the
lever position.
3
Set the IRIS switch on the lens to A (auto) and point
the camera at objects of different brightness. Check
that the automatic iris adjustment operates correctly.
4
Set the IRIS switch on the lens to M (manual) and
check that turning the iris ring manually adjusts the iris
correctly.
5
Set the IRIS switch on the lens back to A (auto) and
check the following points when the GAIN switch is
moved from L to M to H.
• For objects of the same brightness, the iris is
adjusted to correspond to the change in setting.
• The gain indicator on the viewfinder screen changes
to correspond to the change in setting.
6
When a lens with extender is mounted, set the lens
extender lever to the 2x position and check that auto
iris functions correctly.
Testing the VDR
Continuously carry out the procedures from “(1) Testing
the recording and playback functions” to “(6) Checking the
user bit and timecode functions” described below.
(1) Testing the recording and playback functions
1
Using the following buttons in the LCD monitor,
display the text information.
DISPLAY/EXPAND button: CHAR
COUNTER/CHAPTER button: COUNTER
BRIGHT button: adjustment of backlight brightness
2
Set the PRESET/REGEN/CLOCK switch to PRESET,
and set the F-RUN/SET/R-RUN to R-RUN.
3
Press the REC button and check the following points.
• The time counter indication in the LCD monitor
changes.
• The REC indicator in the viewfinder is on.
4
Press the REC button again.
Check that recording stops and that the REC indicator
in the viewfinder goes off.
5
Repeat the checks of steps 3 and 4, this time using the
REC button on the lens.
Press the RESET button and check that the indication
in the time counter display section of the LCD monitor
is reset to “00:00:00:00”.
6
Press the F REV button and check that fast reverse
playback is performed. Next, press the PLAY/PAUSE
button and check that normal playback is performed.
7
Press the STOP button and check that playback stops.
Next, press the F FWD button and check that fast
forward playback is performed.
8
Press the STOP button again, then press the PREV
button.
Check that the image of the beginning of the current or
previous clip is displayed.
9
Press the NEXT button, and check that the image of
the beginning of the next clip is displayed.
(2) Testing the automatic audio level adjusting
functions
1
Set both AUDIO IN CH-1 and CH-2 switches to
FRONT.
2
Set both AUDIO SELECT (CH-1 and CH-2) switches
to AUTO.
3
Set both AUDIO IN CH-3 and CH-4 switches to F
(FRONT).
4
Aim the microphone connected to the MIC IN
connector at a suitable sound source.
Check that the level indications for channels 1 to 4
correspond to the sound level, respectively.
(3) Testing the manual audio level adjusting functions
1
Set both AUDIO IN CH-1 and CH-2 switches to
FRONT.
2
Turn the MIC LEVEL control.
Check that the channel-1 and -2 audio level meters on
the LCD monitor shows no segment when you fully
turn the control counterclockwise as seen from the
camcorder front.