


52
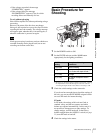
Basic Procedure for Shooting
Chapter 3 Recording and Playback
5
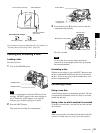
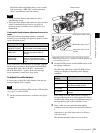
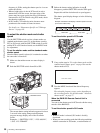
Check the lens settings and flange focal length
adjustment (see page 34).
6
Adjust the viewfinder eyepiece focus, and the contrast
and brightness of the viewfinder image (see page 36).
7
Check the audio system settings.
• Microphone connections (see page 40)
• Settings on the VDR section (see page 19)
8
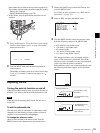
If necessary, display the center marker and/or safety
zone marker on the viewfinder screen.
For details, see “Setting the Marker Display” on
page 138.
Also, press the ZEBRA button to display a zebra
pattern on the viewfinder screen.
9
If necessary, adjust the white balance and black
balance (see page 54).
10
If necessary, adjust the iris and gain.
For details about the adjustment of iris, see “Adjusting
the Iris” on page 59.
For details about the adjustment of gain, see “GAIN
switch” on page 14, and “Setting Gain Values for the
GAIN Switch Positions” on page 141.
11
Turn the focus ring so that the subject is sharply in
focus.
The EZ focus function allows you to set the aperture
function to open, and to easily and precisely adjust the
focus before shooting.
Before use, this function must be assigned to the
ASSIGN 1 or 2 switch.
For details, see “Assigning Functions to ASSIGN
Switches” (page 143).
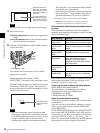
About the EZ focus function
When you press the switch to which this function is
assigned (the ASSIGN 1 or 2 switch), the function is
turned on and “EZ FOCUS” appears in the viewfinder
screen and the LCD monitor. To turn the function off,
press the switch again. Even if you do not press the
switch, the function goes off automatically after 10
seconds.
The EZ focus function goes off automatically if it is on
when you press the REC button on this unit or the lens.
Recording starts immediately thereafter.
12
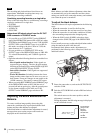
Set up the VDR section according to your shooting
objects, then start recording by pressing the REC
button.
• During recording, the REC/TALLY indicator in the
viewfinder lights, and “REC” appears on the
viewfinder screen.
• You can use the AUDIO LEVEL knob on the front
of the camcorder to manually adjust the channel 1
audio level. To do this, you must first set up the VDR
section to enable manual adjustment of the audio
recording level (see page 60).
13
To pause recording, press the REC button again.
The REC/TALLY indicator in the viewfinder goes off.
The material recorded from step 12 to step 13 is saved
as a single clip.
To play back the recorded clip
Press the PREV button, then press the PLAY/PAUSE
button to play from the beginning of the clip.
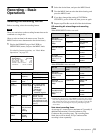
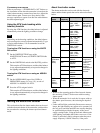
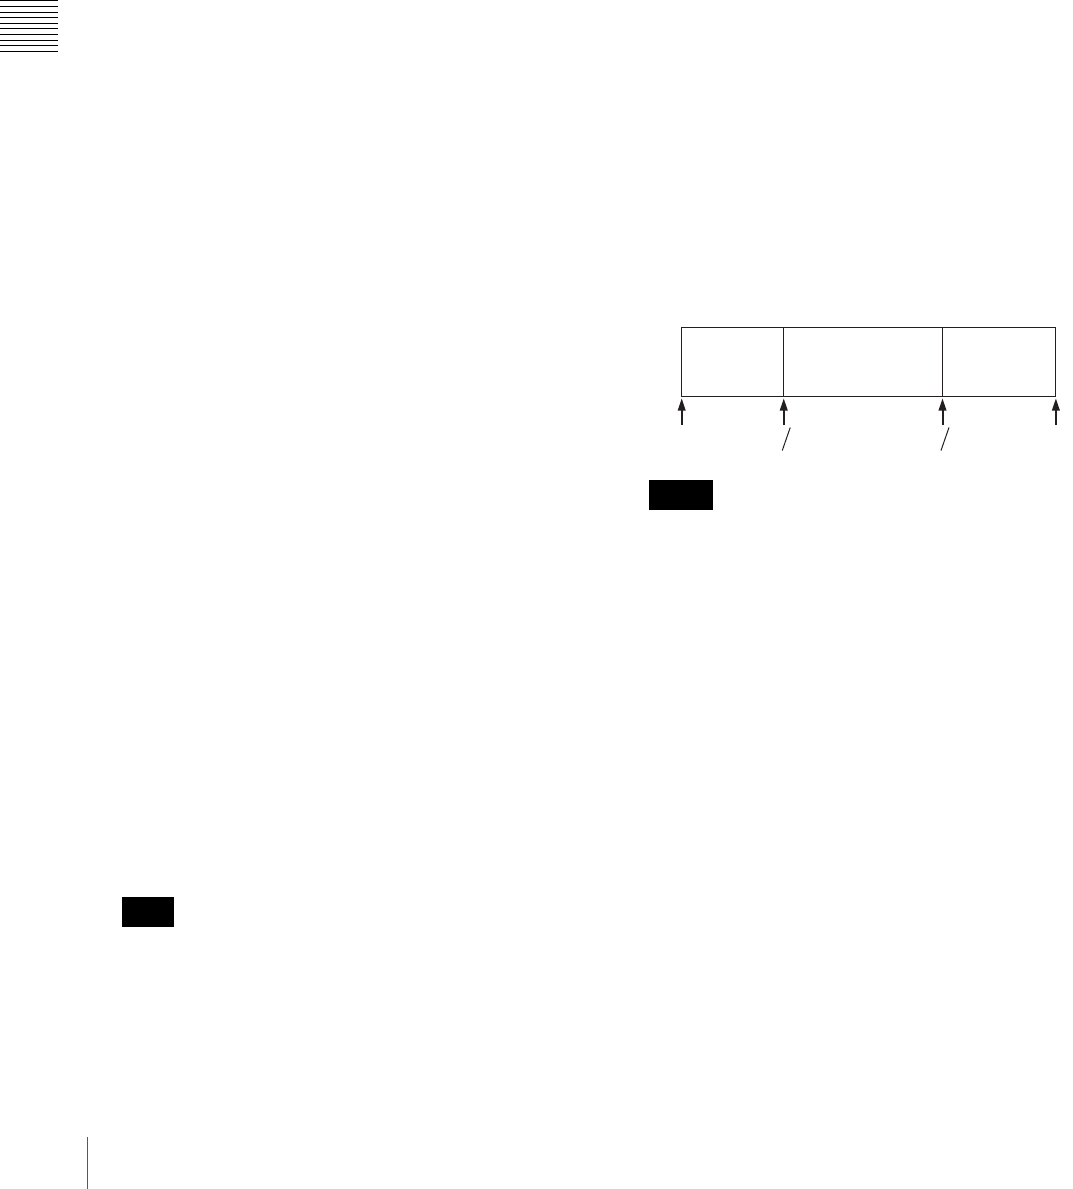
14
Repeat steps 12 and 13 as required to continue
shooting.
Successive clips are recorded on the disc.
• It is not possible to record a clip shorter than 2
seconds. If you stop recording within 2 seconds of
starting, this results in a 2-second clip.
If you stop recording and restart within 2 seconds of
the original start, this creates a single continuous clip
from the original start time.
• The maximum number of clips that can be recorded
on a single disc is 300. If an attempt is made to
record more than 300 clips, the error message “DISC
FULL!” appears, even if there is free capacity on the
disc.
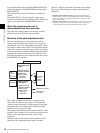
Note
Notes
REC
START
REC
STOP
REC
START
REC
STOP
REC
START
REC
STOP
Clip 1 Clip 2 Clip 3