


Advanced Operations for Shooting
104
Chapter 4 Shooting
1 Display the SOURCE SEL page of the
OPERATION menu.
2 Select REC VIDEO SOURCE, and turn
the MENU knob to display “EXT”.
3 Select EXT VIDEO SOURCE, and turn
the MENU knob to display “VBS”.
1)
1)Does not appear when the optional CBK-SC02
Analog Composite Input Board is not installed.
After you complete this setting, you can record
external video signals by inputting analog
composite signals to the GENLOCK IN
connector.
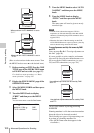
You can connect a USB flash drive to the USB
connector and use it to save proxy metadata.
(Here, “proxy metadata” refers to proxy AV data
for the clips on the disc as well as to metadata.)
1)
You can then connect this USB flash drive to a
computer with the PDZ-1 Proxy Browsing
Software installed and use the software to view
the proxy AV data, to edit and enter metadata
(titles, comments, essence marks, and so on), and
to create clip lists.
1)When recording of proxy metadata finishes, the
planning metadata that has been loaded into this unit
(if any) is also copied to the USB flash drive. The data
is saved in the following directories, which are created
automatically when a USB flash drive is mounted.
• Proxy AV data: \MSSONY\PRO\XDCAM\
MEMDISC\PROAVID\Sub
• Metadata: \MSSONY\PRO\XDCAM\MEMDISC\
PROAVID\Clip
• Planning metadata: \MSSONY\PRO\XDCAM\
MEMDISC\PROAVID\General\Sony\Planning
Notes
• If you start recording immediately after powering the
unit on, and then stop recording after only a short time,
the recording operation does not end until the unit has
recognized the USB flash drive and recorded the proxy
data to it. Note that if you enable this function and start
recording without connecting a USB flash drive,
recording will take longer because the unit will require
more time to recognize that no flash drive is connected.
• USB flash drives must be formatted with the FAT32
file system. If a drive is formatted with any other file
system, reformat it on this unit (see page 106).
• Never remove a USB flash drive while it is being
accessed (while this unit’s ACCESS indicator is lit).
Doing so can corrupt the data on the USB flash drive
and make it unusable.
To enable proxy data recording and
copying to USB flash drives
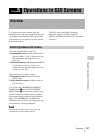
1 In the OPERATION menu, display the
MEMORY REC page.
See “Basic menu operations” (page 193) for
more information about menu operations.
2 Select MEMORY REC, and turn the
MENU knob until ENABL appears.
This enables proxy data recording and
copying from discs to USB flash drives.
To record proxy data while synchronizing
with disc recording
1 Connect a USB flash drive to the USB
connector.
2 Check the memory symbol and the
memory remaining display (see page
34).
3 After confirming that the USB flash
drive has enough free capacity, press
the REC START button or the VTR
button on the lens to start recording as
normal.
1)
The clip’s proxy data is written to the USB
flash drive at the same time that the clip is
recorded to the disc.
1) After the unit is powered on. some time is required for
the memory symbol to appear. However, if the
connected USB flash drive has enough free memory
and recording is enabled, then recording of proxy data
to the USB flash drive begins as soon as recording
starts, even if the memory symbol has not yet
appeared. The proxy data is the same data as the proxy
data for clips that are recorded to the disc.
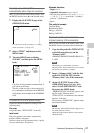
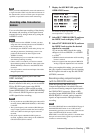
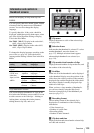
Recording proxy data
MEMORY REC : ENABL
COPY CURRENT CLP : EXEC
COPY ALL CLIPS : EXEC
ABORT COPY : EXEC
DELE ALL MEM CLP : EXEC
FORMAT MEMORY : EXEC
030 MEMORY REC TOP