


Microsoft Picture It! Companion Guide
Chapter 4: Picture It! Basics
58
Basic Image Formatting
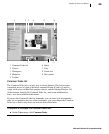
When a picture is on the canvas, you can manipulate the image to a different
size or orientation. You can make many of these changes directly on the canvas
by dragging the different handles on a picture. All of these controls can also be
accessed through the menus.
Changing picture size
When you open an image so that it appears on the canvas, it is automatically
sized so that it fills the workspace. As a result, a high resolution image, such as
1600 x 1200 pixels, will look as large as a low resolution image that’s only 640
x 480 pixels. For this reason, viewing a picture on the canvas is not a reliable
way of judging an image’s resolution.
When you change a picture’s actual size (not just zooming in on the canvas),
you change the number of pixels in the image. If you have a high resolution
photo that you want to post to a Web site, you might want to make the picture
smaller so that it will be transmitted faster over the Internet. In this situation, as
long as you won’t need to print the image, you can safely reduce the image size
(the number of pixels that make up the image) and still have an image that
looks good on the screen.
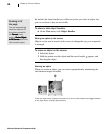
To resize a picture:
1 On the Format menu, click Resize Image.
2 Click an orientation.
3 Click an image size. To see the size expressed in different units, click a
selection on the Units list. If you click Custom, you can enter custom
dimensions in the Height and Width boxes.
4 Click a resolution, and then click Done.
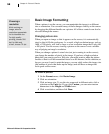
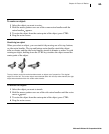
Choosing a
resolution
While resizing an
image, select a
resolution appropriate
for its intended use.
For high quality
printing, choose 300
dpi; for Web and
e-mail, choose 72 dpi.