


Microsoft Picture It! Companion Guide
Chapter 5: Basic Touchup
70
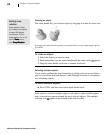
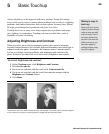
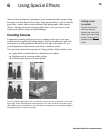
Adjusting Tint
When you take photographs, the source of the light can create a colored cast in
the photo. We tend to think of light being white, but nearly every light source
has its own unique color. For example, natural sunlight has more blue in it,
while incandescent (tungsten) lights—including most household light bulbs—
give off a reddish or yellowish cast.
When taking a photo, you can compensate for these different colors of light by
setting the white balance (with a digital camera), or using special filters (on a film
camera). But if you still end up with a cast in your photos, use the adjust tint tool
to correct the balance of colors to make the lighting look more natural. You
adjust tint by locating a point that should be white, and then Digital Image Pro
balances all of the colors in the photo based on the white point you set.
If you have already used the levels auto fix tool, the tint problems in the photo
may already be corrected. Use the adjust tint tool to make additional adjust-
ments.
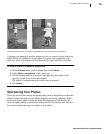
To adjust tint:
1 On the Touchup menu, click Adjust Tint.
The mouse pointer becomes an eyedropper.
2 With the eyedropper, click an area in the photo that should be white.
Picture It! automatically corrects the colors.
3 If you are not satisfied with the results, use the sliders for fine-tuning. Set
the Color slider to the color of the cast in the photo, and then use the
Amount slider to lower the amount of that color in the photo.
4 Click Done.
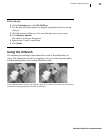
Fixing Red Eye
Using your flash indoors in low light situations can give your subjects red,
unnatural-looking eyes. The Fix Red Eye tool eliminates the redness.
Setting the white
balance on a
digital camera
Many digital cameras
allow you to set the
white balance for
specific types of light,
such as sunlight,
incandescent, and
flash. Using this
feature can help
reduce tint problems in
your photos.
Zooming in to
find white
If there are no
significant areas of
white in your photo,
use the zoom tool to
magnify the photo on
the screen. When you
zoom in, you may be
able to use a very
small area of white,
such as the white of a
person’s eyes.