3
Select the exposure correction menu, and set the basic
exposure.
œ Press [d] or [c] on the arrow button to set the base
exposure setting. For how to set the exposure, see
“Exposure correction” on page 81.
œ Based on the set exposure setting, 7 images are
captured over a range of exposures, from underexposed
to overexposed. The base exposure can be set
anywhere from –0.9 EV to +0.9 EV.
œ For AE shift sequential shots, the shutter operation
setting is not necessary. (The shutter operation menu is
not available.)
œ You can set the main switch to “MONITOR OFF” and
take pictures using the viewfinder.
œ To exit the Shooting Setting Screen, press the MODE
button.
4
Press the shutter release button to capture the
sequential shot.
œ For AE shift sequential shots, the digital camera will
capture all seven images (it is not necessary to hold
down the shutter release button).
œ During shooting using the LCD monitor, K will appear
in the LCD monitor while images are being captured.
œ After taking the picture, you can view the first captured
image by setting the main switch to Ô (see page 102).
When you have finished capturing images, turn off the digital camera.
HINT
Shortcut for setting the exposure correction
œ If the Shooting Setting Screen or Information Screen is not displayed, you can press the arrow
button to quickly display the icon for setting the exposure correction (see page 81).
NOTE
œ In the sequential shot mode, the flash and self-timer cannot be used.
œ With AE shift sequential shots, the exposure may not change depending on the ambient lighting.
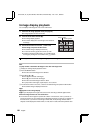
EXPOSURE
16
Exposure correction bar
Pointer
Make darker Make brighter
16
3.8
1/30
REC (recording) indicator
SX511/EX, /E, /U (VPC-AZ1EX, VPC-AZ1E, VPC-AZ1 GB) Thu. Nov., 29/2001
English
66