


SETTING THE WHITE BALANCE
With the normal settings, this digital camera automatically adjusts the white balance under most
lighting conditions. However, if you want to specify the lighting conditions or change the overall
tone of the image, the white balance can be manually set.
1
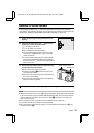
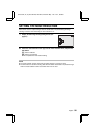
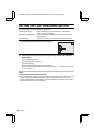
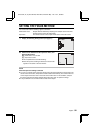
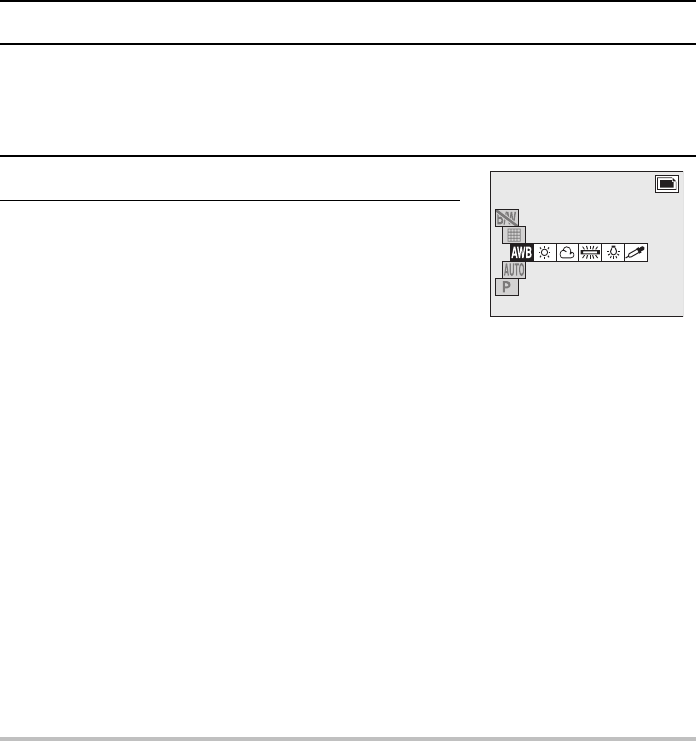
Display the Shooting Setting Screen (see page 31).
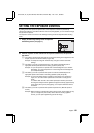
2
Select a white balance setting from the white balance
setting menu, and press the SET button.
H: The digital camera will make the white balance
adjustment automatically based on the natural and
artificial light conditions. This is the setting used in the
auto mode.
g: For shooting outside on a sunny day.
h: For shooting outside on a cloudy day.
e: For shooting inside under fluorescent lighting.
i: For shooting inside under incandescent lighting.
S: For more accurate adjustment or when the light source cannot be specified.
Setting procedure
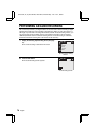
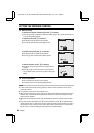
1 Select the S icon and press the SET button.
œ The S icon moves to the left.
2 Fill the entire screen with plain white card (or piece of paper, etc.)
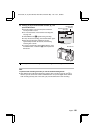
3
Press the SET button.
œ The white balance setting programmed with the S icon is retained even if
another white balance setting (H, g, h, e, or i) is set. By selecting
the S icon and pressing the SET button, these same settings can be used
again.
œ This completes the white balance setting.
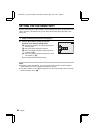
NOTE
œ To cancel the white balance setting and return to the automatic setting, perform step 1 and
select H, then press the SET button.
HINT
To capture sepia-tone images
œ In step 2 of step 2, instead of using a white card, use a blue card to set the white balance. You
can experiment by changing the card color with which the white balance is performed for
different results.
WHITE BALANCE
12
SX511/EX, /E, /U (VPC-AZ1EX, VPC-AZ1E, VPC-AZ1 GB) Thu. Nov., 29/2001
English
86