


118 Chapter 5 Adjustments and Settings
Chapter 5 Adjustments and Settings
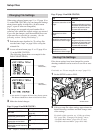
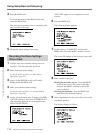
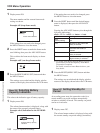
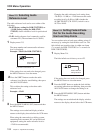
1 Press the MENU button.
“DIAG” appears in the display window and the
time data display in the display window switches
to the menu display.
2 Press the ADVANCE button repeatedly until the
desired menu appears.
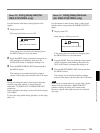
3 Press the SHIFT button.
This shows the current settings for the menu
selected by step 2.
The setting can be changed for the digit that is
blinking.
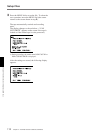
To exit from changing settings
Press the MENU button to close the menu.
Year (factory-set to 2001)
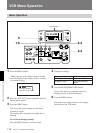
Basic Operation
2,4
1,6
3,4
5
H MIN SEC FRM
1
dB
2
PB DATE NDF EXT-LK HOLD
CLIP
TAPE
BATT
DIAG
EF
RF SERVO HUMID SLACK
Li
-
-40
-30
-12
0
IP
CL
CONT
OVER OVER
WARNING
RESET
(MENU SET)
LIGHT
DISPLAY
ON
OFF
COUNTER
TC
U-BIT
-20
DVCAM
F
8
32k
F
8
48k
REC TIME SKIN DTL EXT VTR
OUTPUT
VTR
TRIGGER
AUDIO LEVEL
AUDIO SELECT
AUDIO IN
CH-1
LITHIUM BATT
MENU
TTL
DUR
ON
OFF
OFF
TTL RESET
PARALLEL
PRESET
DATE/TIME
F-RUN
REGEN
F-RUN
R-RUN
VJ MIC
WIRELESS
SET
INT ONLY
EXT ONLY
FRONT
REAR
MIX
EXT
VBS
COMPONENT.
MONITOR SELECT
Y/C
SET
ClipLink
CONTINUE
ADVANCE SHIFT
CH-1
CH-2
FRONT MIC
LOW CUT
ON
OFF
MONITOR OUT
CHARACTER
ON
OFF
AUTO
MAN
CH-2
HYPER
GAIN
ON
OFF
SETUP
FILE
STD
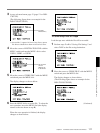
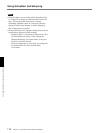
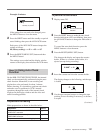
4 Change the settings.
5 Press the RESET/(MENU SET) button.
This records the new setting and returns to a
blinking display of the menu number.
6 Press the MENU button.
This returns the display window to the display
shown before the VCR menu.
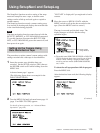
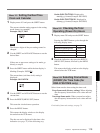
Menu No. (blinking)
Display window
Step
Operation
Select digit to be changed Press the SHIFT button.
Change the value Press the ADVANCE
button.
VCR Menu Operation