


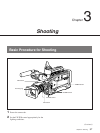

Chapter 3 Shooting 63
Chapter 3 Shooting
4 Display menu 212 and select the audio recording
mode (two-channel mode or four-channel mode).
For menu operation, see “Selecting Audio Recording
Mode — Menu 212” (page 123).
Note
One of the following warning indications appears
in the display area when you change the audio
mode setting during recording pause.
The recordings at switching points prevent editing.
Avoid changing the audio mode once you have
started recording.
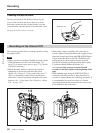
5 Set up the camcorder to suit your recording
objectives, and press the VTR button on the
camcorder or lens.
Recording begins when the TALLY indicator stays
lit after blinking for a moment.
During recording, the tape transport buttons
(EJECT, REW, F FWD, PLAY, and STOP) cannot
be used.
Warning indication
Status
Fs 48k (flashes four
times per second)
Attempting to switch from 32-kHz
mode (four-channel mode) to 48-kHz
mode (two-channel mode).
Fs 32k (flashes four
times per second)
Attempting to switch from 48-kHz
mode (two-channel mode) to 32-kHz
mode (four-channel mode).
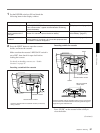
Operation Step
To view image
being shot
• Look into the viewfinder.
• Connect a video monitor to the
MONITOR OUT connector or S
VIDEO OUT connector.
To listen to audio
track being shot
Connect an earphone to the
EARPHONE connector
or listen to the audio from the
speaker.
To pause recording Press the VTR button on the
camcorder or lens.
For instructions on continuing to
record after a pause, see “Back
Space Editing” (page 67).
To stop recording
Press the VTR button on the
camcorder or lens, then press the
STOP button.
With this state, it is impossible to start
back space editing.
To remove the
cassette
Check that the power is on, then
press the EJECT button to open the
cassette holder and remove the
cassette. Close the cassette holder.
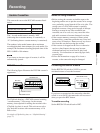
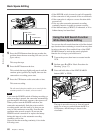
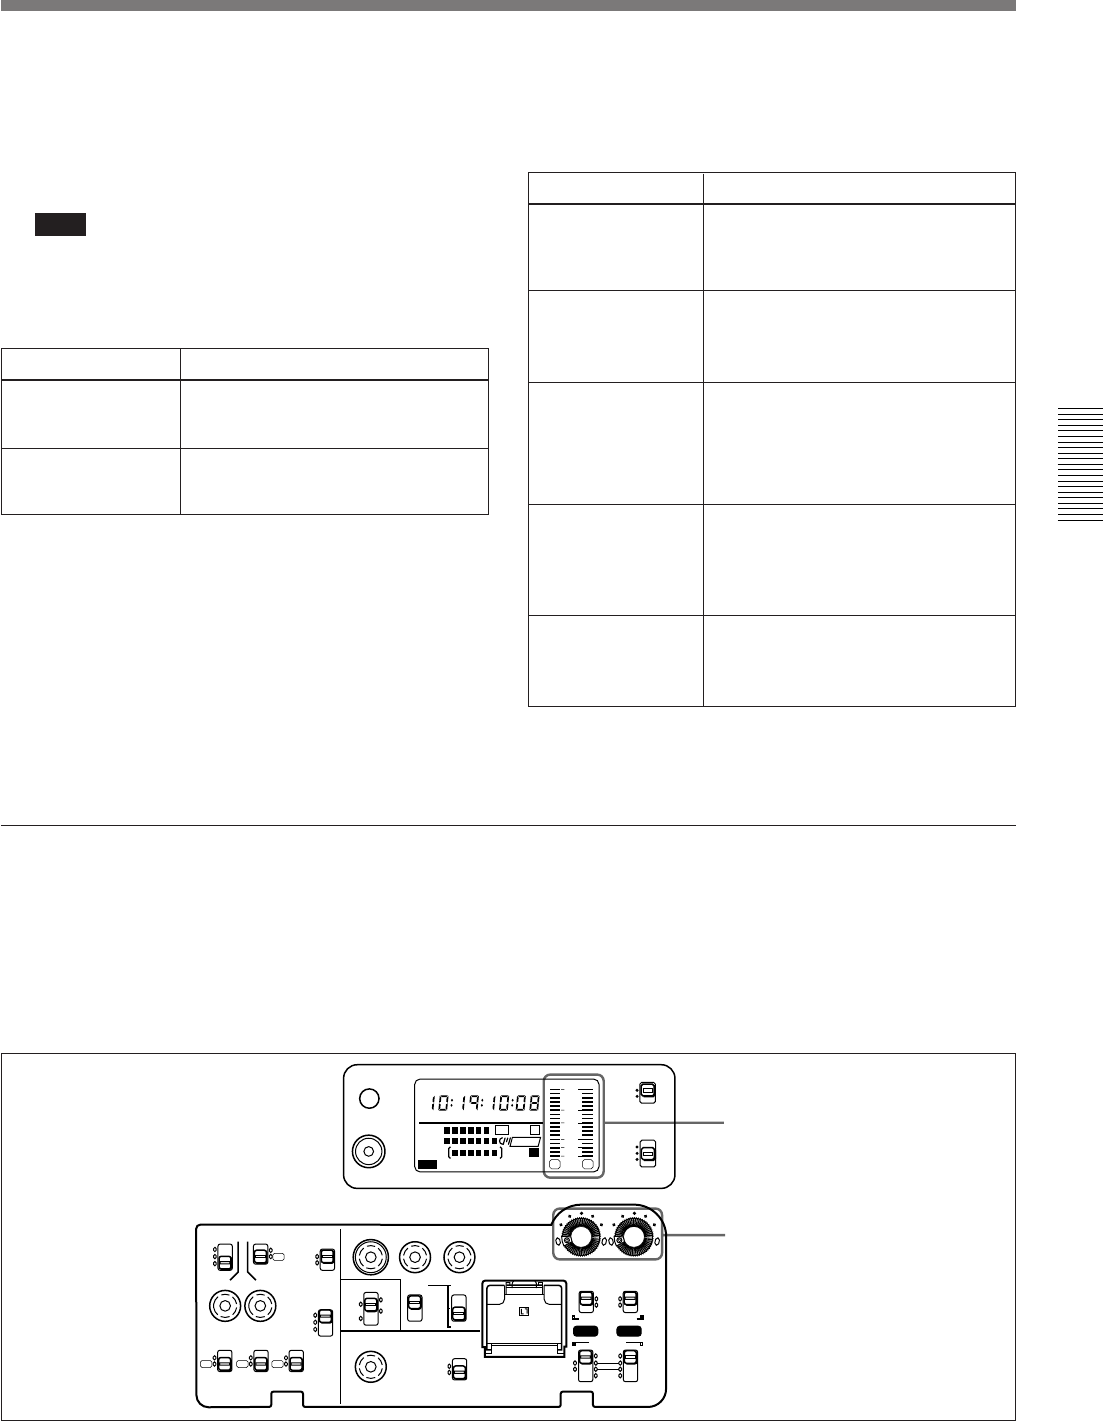
Manually adjusting audio recording level
2 While checking the audio level in the display
window, turn the AUDIO LEVEL (CH-1/CH-2)
knob for the channel being used for microphone or
wireless microphone system connection (CH-1 or
CH-2) so that the maximum audio level is under
0 dB.
Audio level
indications
AUDIO LEVEL
(CH-1/CH-2)
knobs
•
H MIN SEC FRM
1
dB
2
PB DATE NDF EXT-LK HOLD
CLIP
TAPE
BATT
DIAG
EF
RF SERVO HUMID SLACK
Li
-
-40
-30
-12
0
IP
CL
CONT
OVER OVER
WARNING
RESET
(MENU SET)
LIGHT
DISPLAY
ON
OFF
COUNTER
TC
U-BIT
-20
DVCAM
F
8
32k
F
8
48k
REC TIME SKIN DTL EXT VTR
OUTPUT
VTR
TRIGGER
AUDIO LEVEL
AUDIO SELECT
AUDIO IN
CH-1
LITHIUM BATT
MENU
TTL
DUR
ON
OFF
OFF
TTL RESET
PARALLEL
PRESET
DATE/TIME
F-RUN
REGEN
F-RUN
R-RUN
VJ MIC
WIRELESS
SET
INT ONLY
EXT ONLY
FRONT
REAR
MIX
EXT
VBS
COMPONENT.
MONITOR SELECT
Y/C
SET
ClipLink
CONTINUE
ADVANCE SHIFT
CH-1
CH-2
FRONT MIC
LOW CUT
ON
OFF
MONITOR OUT
CHARACTER
ON
OFF
AUTO
MAN
CH-2
HYPER
GAIN
ON
OFF
SETUP
FILE
STD
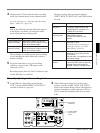
1 In step 3 above (“Recording on the Internal
VCR”), set the AUDIO SELECT (CH-1/CH-2)
switches to MAN (see page 62).