


Thumbnail Operations
111
Chapter 5 Operations in GUI Screens
2 Do one of the following.
To confirm the edit and then exit the
software keyboard: Press the Tab key
to move to “OK”, and then press the
Enter key.
To discard the edit and then exit the
software keyboard: While “Cancel” is
selected, press the Enter key.
To continue editing: Press any key except
the Enter key, the Esc key, and the Tab
key.
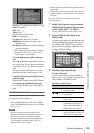
You can set three types of clip flags (OK/NG/KP
(KEEP)) during recording or playback. Setting
these flags in each clip that you record makes it
easy for editors and other colleagues to find and
select the clips they need.
See page 103 for more information about thumbnail
screen operations.
1 In the clip thumbnail screen, select the
thumbnail of the clip where you want to
set a flag.
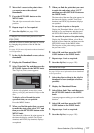
2 Display the Thumbnail Menu.
3 Select “Set Clip Flag”.
The clip flag setting screen appears.
4 Select the clip flag that you want to set
(OK/NG/KP (KEEP)).
A clip flag icon (see page 97) appears for
clips that have clip flags set.
To clear clip flags
Carry out steps 1 to 3, selecting a clip that has a
flag set, and then select “none” in step 4.
You can also use switches to set and clear clip flags.
For details, see “Setting clip flags with switches”
(page 80).
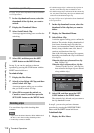
In a clip thumbnail screen, you can lock the
selected clips so that they cannot be deleted or
altered.
Locking prevents the following operations on
clips.
•Deletion
• Renaming by FTP
• Changing the index picture
• Adding and deleting shot marks
• Setting and clearing clip flags
Notes
• Locked clips are deleted along with other clips when a
disc is formatted.
• Clips cannot be locked or unlocked when the Write
Inhibit tab of the disc is set to the recording disabled
position.
To lock clips
See page 103 for more information about thumbnail
screen operations.
1 In the clip thumbnail screen, select the
thumbnails of the clips that you want to
lock.
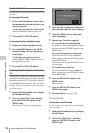
2 Display the Thumbnail Menu.
3 Select Lock/Unlock Clip.
4 Press the SET/S.SEL button or the
MENU knob.
A lock icon (see page 98) appears on the
thumbnail of the locked clips.
In step 1, you can also perform a shortcut
operation by pressing the STOP button with the
SHIFT button held down.
To lock all clips
1 Display the Disc Menu.
2 Select Lock or Delete All Clips, and then
select Lock All Clips.
A message appears asking you to confirm
locking all clips.
3 Select OK to lock all clips or Cancel to
cancel it, and then press the SET/S.SEL
button or the MENU knob.
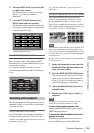
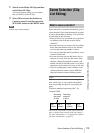
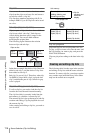
Setting clip flags
Thumbnail Menu
Set Clip Flag
Return to Upper Menu
OK
NG
KP (KEEP)
none
Locking (write-protecting) clips