


Scene Selection (Clip List Editing)
113
Chapter 5 Operations in GUI Screens
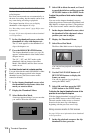
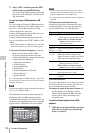
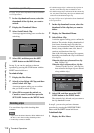
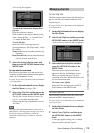
2 Select Lock or Delete All Clips, and then
select Delete All Clips.
A message appears asking you to confirm
that you want to delete all clips.
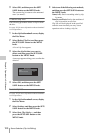
3 Select OK to execute the deletion, or
Cancel to cancel it, and then press the
SET/S.SEL button or the MENU knob.
Note
Locked clips cannot be deleted.
Scene selection is a function which allows you to
select material (clips) from the material recorded
on a disc and perform cut editing. You can do this
by operating on this unit only.
• Scene selection is a convenient way to perform
cut editing in the field and in other offline
situations.
• In scene selection you create a clip list (editing
data). Since the material itself is not affected,
you can repeat this any number of times.
• You can play back the edit list created by scene
selection on this unit.
• In scene selection you can add whole clips or
add parts of a clip. You can add scenes using
chapters, change the playback sequence, and
amend or delete In and Out points. All of these
operations can be carried out easily on this unit.
• Clip lists (editing data) created with the scene
selection function can be used on XPRI and
other full-feature nonlinear editing systems.
Clips
Material recorded with this unit is managed in
units called clips. A clip contains the material
from a recording start point to a recording end
point.
Clips have numbers beginning with C, for
example C0001.
You can also assign titles to your clips and use the
titles to manage them, instead of the clip numbers.
For more information, see “Assigning user-defined
clip titles automatically” (page 87).
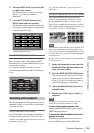
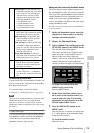
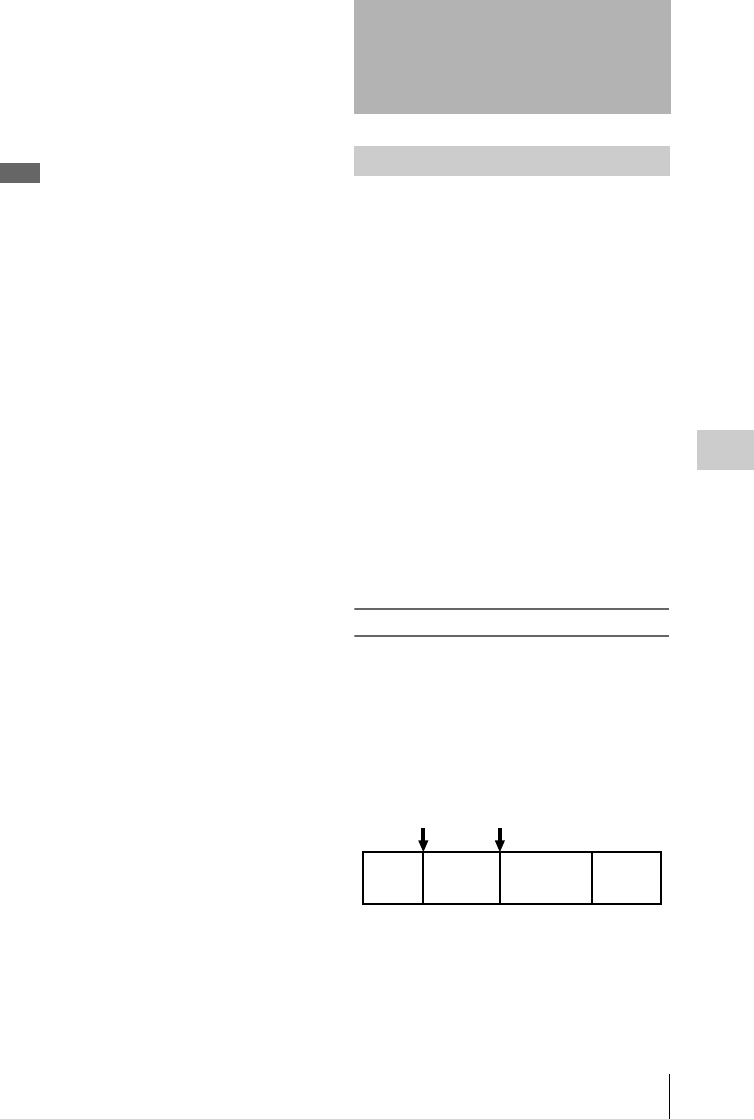
Scene Selection (Clip
List Editing)
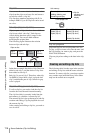
What is scene selection?
Recording
start point
of clip 2
Recording
end point
of clip 2
Clip 1
(C0001)
Clip 2
(C0002)
Clip 3
(C0003)
Clip 4
(C0004)