


File Operations in File Access Mode (for Windows)
200
Chapter 8 File Operations
2 If this unit is connected to a remote
computer by FTP, log out from the FTP
session (see page 204).
3 Connect the (i.LINK) S400 connector
on this unit to the i.LINK (IEEE1394)
connector on the remote computer,
using an i.LINK cable.
Windows recognizes this unit as a removable
disc, and displays one of the following icons
on the remote computer’s taskbar:
• Windows XP:
• Windows Vista:
The remote computer is now able to perform
file operations when a disc is inserted into
this unit.
Note
You will not be able to log in if you put the unit into
the state described in step 1 after connecting the
cable. To log in, disconnect the cable, put the unit
into the state described in step 1, and connect it
again.
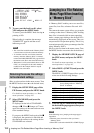
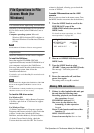
When you make your first FAM connection
The Found New Hardware Wizard dialog appears
when you connect this unit to your computer.
Select “Install the software automatically
(Recommended)”, and then click the Next button.
Click the Finish button when the software
installation finishes.
Operation limitations during FAM connections
• With the exception of the EJECT button,
recording buttons and playback control buttons
are disabled.
• VDR of this unit cannot be controlled from
devices connected to the REMOTE connector
(8-pin) and (i.LINK) S400 connector.
1 Start Explorer.
Check that a drive letter has been assigned to
this unit. (The drive letter will differ
depending on the number of other peripherals
connected to the remote computer.)
2 Use Explorer to perform file operations
on the disc loaded in this unit.
You can operate in the same way that you
operate on local drives and files on network
computers.
Notes
• If you power this unit off during a FAM
connection, the data transferred thus far is
discarded.
• All file operations are not possible for some types
of files.
For details, see “File operation restrictions”
(page 195).
To eject discs from a remote computer
Right click the icon representing this unit in
Explorer, and select Eject from the menu which
appears.
Note
Do not disconnect the cable before performing steps 1 to
3.
1 Do one of the following on the or
icon displayed in the remote computer’s
taskbar.
• Double click.
• Right click to display the context menu and
select “Safely Remove Hardware” from the
context menu.
The Safely Remove Hardware dialog
appears.
2 Select “Sony XDCAM PDW-700 IEEE
1394 SBP2 Device” and click “Stop”.
The Stop a Hardware device dialog appears.
3 Select “Sony XDCAM PDW-700 IEEE
1394 SBP2 Device” and click “OK”.
In Windows XP, “Sony XDCAM PDW-700
IEEE 1394 SBP2 Device” is deleted from the
list of hardware devices.
In Windows Vista, the message “This device
can be safely removed from your computer.”
appears.
This unit can now resume normal operations.
(The limitations described in “Operation
limitations during FAM connections” on
page 200 no longer apply.)
4 Disconnect the i.LINK cable as
required.
Operating on files
Exiting file operations