1-23
Detailed Settings
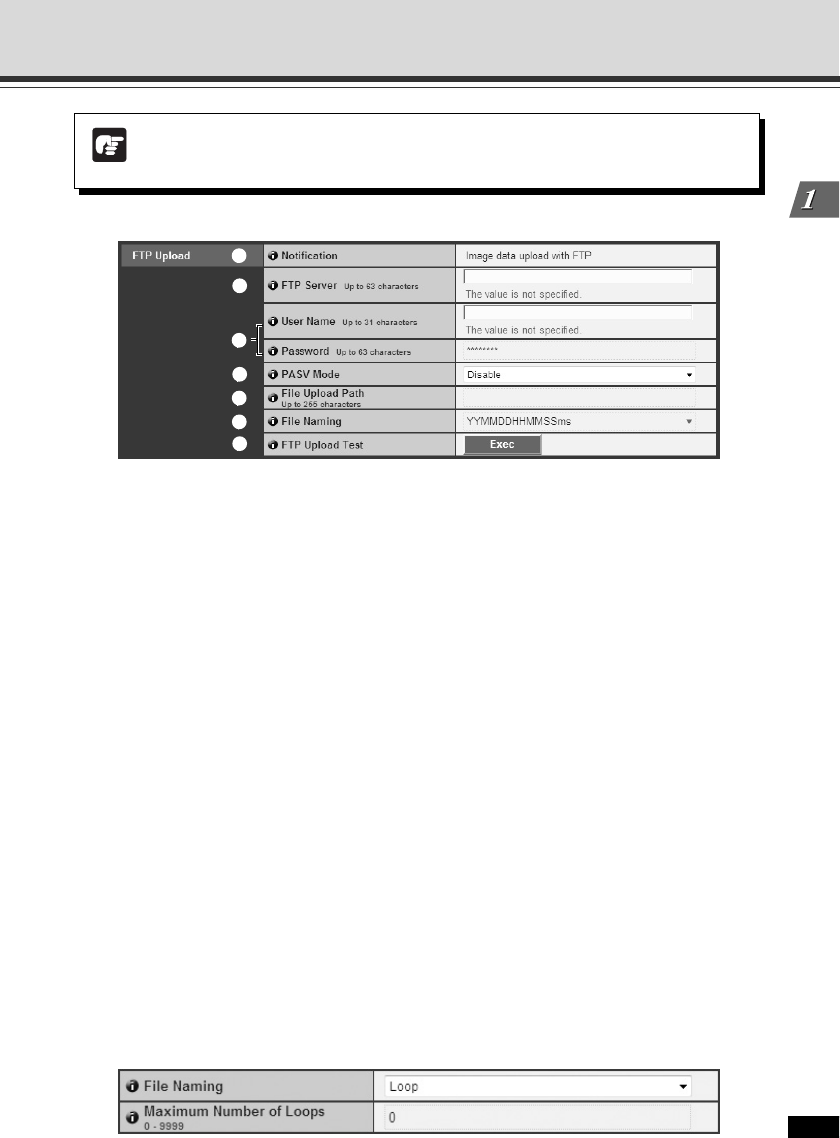
▼FTP Upload
1 Notification
The information to be notified is set to “Image data upload with FTP”.
2 FTP Server
Enter the FTP server’s host name or IP address (using up to 63 characters).
3 User Name, Password
Enter the user name and password required for authentication.
4 PASV Mode
When uploading via FTP, select whether or not to use the PASV mode from “Enable” or
“Disable”.
5 File Upload Path
Enter a remote path for image files to be upload to (using up to 255 characters).
6 File Naming
Select the file naming rule.
“Year month day hour second ms”
Images are uploaded with file name “{year}{month}{day}{hour}{minute}{second}{ms}.jpg”.
(e.g.: 20080123112122000.jpg)
“Year month day folder / hour minute second ms”
First, a folder named “{year}{month}{day}” is created, and then images are uploaded with
file name “{hour}{minute}{second}.jpg”. (e.g.: 20080123/112122000.jpg)
“Loop”
Images are uploaded with a file name starting from the number “0000” up to the number set
in “Maximum Number of Loops”. (e.g.: 0000.jpg, 0001.jpg)
“User settings”
Images are uploaded with a file name specified in “Subdirectory Name to Create” and “File
Name to Create”.
Set HTTP Upload, FTP Upload and E-mail Notification (Upload)
Note
Enter “Proxy Server”, “Proxy Port”, “Proxy User Name” and “Proxy Password” when
connecting to the camera via a proxy server.
2
1
3
4
5
6
7
