


Image Quality Maintenance menu procedure
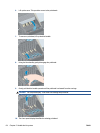
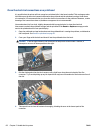
1. Load the paper you wish to use, see Handle the paper on page 25. It should be at least 457.2 mm (18 in)
wide.
CAUTION: Do not use transparent or semi-transparent paper to align the printheads.
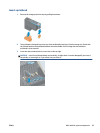
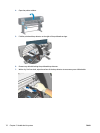
2.
From the front panel, select the Image Quality Maintenance menu icon
, then Align printheads. The
printer checks to see if it has enough paper to run the realignment.
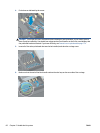
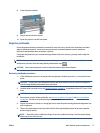
3. If the loaded paper is satisfactory, the printer runs the realignment and prints a realignment pattern.
Ensure the window is closed, as a strong light source near the printer during printhead realignment can
affect alignment.
4. The process takes about five minutes. Wait until the front-panel display shows the process complete
before using the printer.
Scanning errors during alignment
If the alignment process fails, a Scanning problems message appears on the front panel. This means that the
alignment has not completed successfully. Therefore the printer is not aligned and the alignment should be
repeated before printing with good image quality. The problem may be due to:
●
The paper used was not valid, repeat the alignment with valid paper
●
Printhead health problems, clean printheads, see
Clean the printheads on page 174
●
The alignment was done with the window open, repeat the alignment with the window closed
If the problem persists after using valid paper, cleaning the printheads and keeping the window closed, there
may be a failure in the scanning system needing reparation or the printheads, although clean, may not work
and need to be replaced.
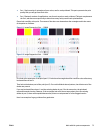
The Image Diagnostics Print
The Image Diagnostics Print consists of patterns designed to highlight printhead reliability problems. It helps
you to check the performance of the printheads that are currently installed in your printer, and whether any
printhead suffers from clogging or other problems.
To print the Image Diagnostics Print:
1. Use the same paper type that you were using when you detected a problem.
2.
Use the
key on the front panel to check that the selected paper type is the same as the paper type
loaded into the printer.
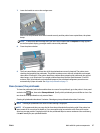
3.
At the printer's front panel, select the Image Quality Maintenance menu icon
, then Print
diagnostic image.
It takes about two minutes to print the Image Diagnostics Print.
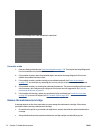
The print is divided into two parts, both of which test printhead performance.
72 Chapter 5 Handle the ink system ENWW