


115
Preparation: Mounting the Camera on a Tripod
Preparation
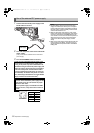
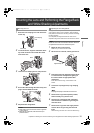
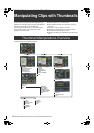
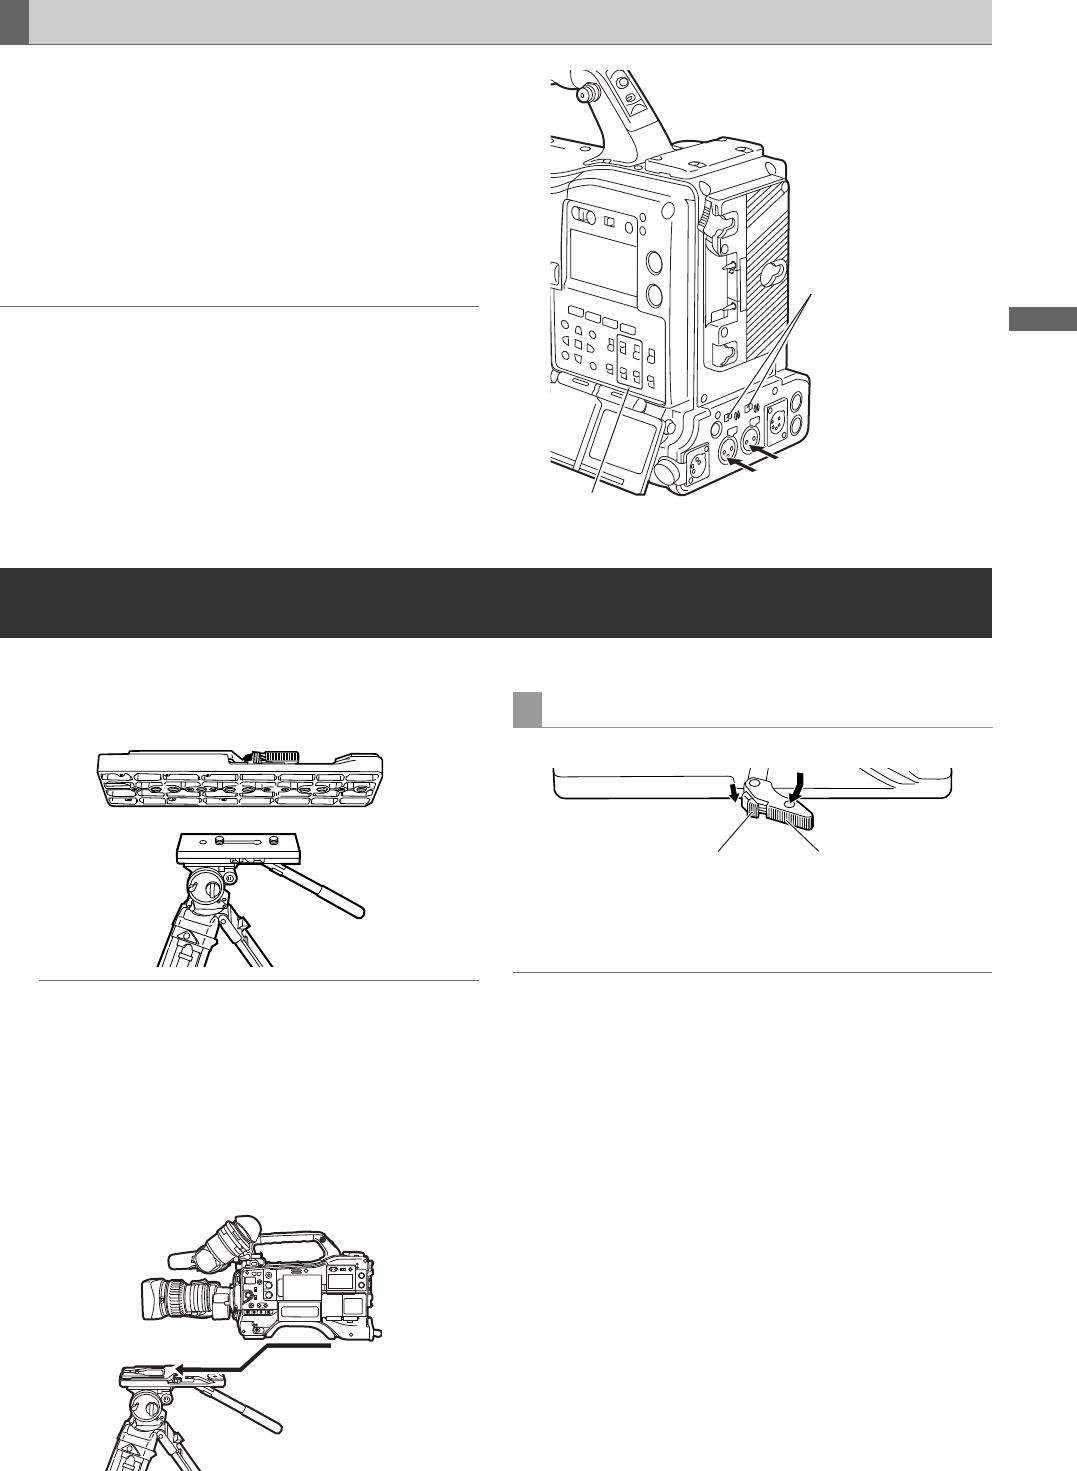
1 Connect the audio device to the AUDIO IN jack
with the XLR cable.
2 Set the AUDIO IN switch to [REAR] for the
channel to which the XLR cable is connected.
3 Set the LINE/MIC selector switch on the rear
panel to [LINE].
Note
This can be set to detect when a connector is inserted into the
AUDIO IN terminal, and automatically switch between signals
input to CH1/CH2 and to CH3/CH4.
> [REAR XLR AUTO CH1/2], [REAR XLR AUTO CH3/4] (page
189)
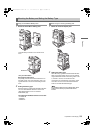
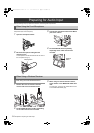
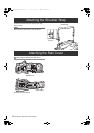
When mounting the camera on a tripod, use the tripod adapter supplied with the camera.
1 Mount the tripod adapter on the tripod.
Note
Select an appropriate hole in the adapter, taking into
account the center of gravity of the camera and tripod
adapter combined.
Also, make sure that the diameter of the selected hole
matches the diameter of the pan head screw.
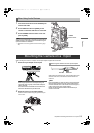
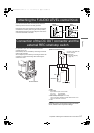
2 Mount the camera on the tripod adapter.
Slide the camera forward along the grooves until you
hear a “click”.
While holding the red lever down, move the black lever in the
direction of the arrow, and slide the camera backward to
remove it.
Note
If the tripod adapter pin does not return to its original position
after the camera has been removed, hold the red lever down
and move the black lever in the direction of the arrow again, in
order to return the pin to its original position.
Please note that the camera cannot be mounted if the pin
remains in the center.
When Using Audio Devices
LINE/MIC
Selector Switch
AUDIO IN Jack
AUDIO IN
Switch
Mounting the Camera on a Tripod
Pan head
Tripod Adapter
Removing the Camera from the Tripod Adapter
Tripod Adapter
Red Lever Black Lever
AJ-HPX3100G(VQT3A79)_E.book 115 ページ 2010年9月17日 金曜日 午後9時21分