


40
Recording and Playback: Interval Recording
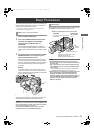
1 Following basic operations of shooting and
recording according to “Basic Procedures”,
lock the camera securely.
2 Check that “i” is blinking in the display, and
that the interval recording mode is selected.
3 Press REC button.
Interval recording starts. Recording automatically stops
after the specified TAKE TOTAL TIME, and the entire
recording is generated as one clip.
“i” starts blinking in the display when the internal
recording mode is selected. “iREC” illuminates after
recording starts. “iREC” blinks during a pause.
The display in the viewfinder is the same as that in the
display window.
The tally lamp illuminates during recording. If PAUSE
TIME is set at 2 minutes or longer, the tally lamp
illuminates at 5-second intervals to indicate that it is
paused. The tally lamp also blinks 3 seconds before
recording starts.
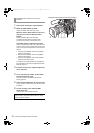
Press the STOP button. Recording stops. Then, the camera
accesses the P2 card to record the video stored in memory
before recording stops. The record from the beginning of the
interval recording to the moment of pressing the STOP
button is generated as one clip.
Press the REC button, again. Interval recording resumes.
z Setting the menu option INTERVAL REC MODE to “OFF”.
When INTERVAL REC HOLD is set to “OFF”, the mode
returns to ordinary recording mode if the POWER switch of
the unit is turned OFF.
If INTERVAL REC HOLD is set to “ON”, the interval
recording mode will not change even if the POWER switch is
turned OFF.
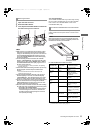
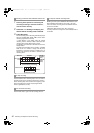
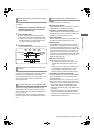
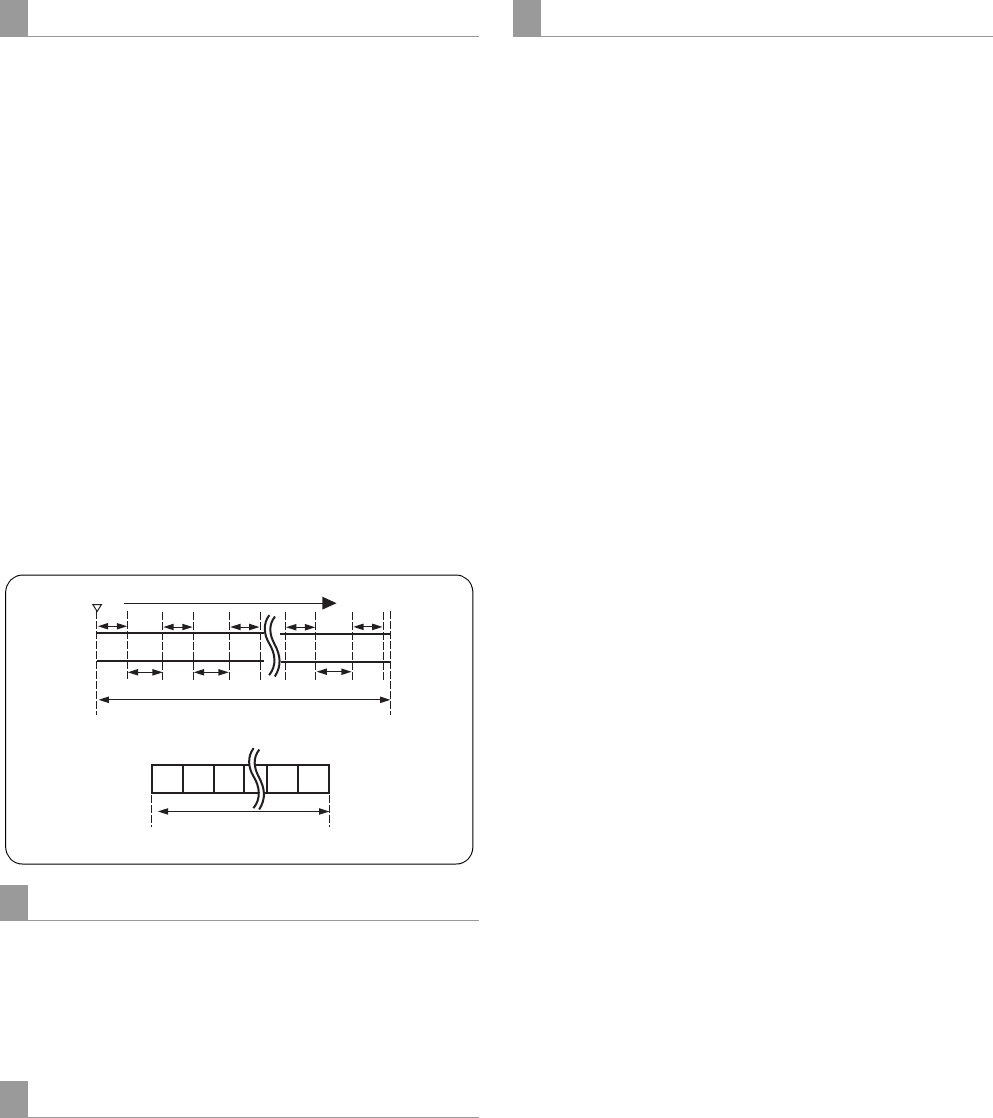
Shooting procedures when INTERVAL REC is ON
To stop recording
For continuous recording
1
1
2
2
3
3
N
N
t1
t1
t2 t2
t1
t1
t2
t1
N-1
N-1
iREC start
Time Axis
Real-time video
Sound
REC TIME
(Recording
time=t1)
PAUSE TIME
(Pausing
time=t2)
TAKE TOTAL TIME
(Time necessary for shooting)
Content on P2 card
TOTAL REC TIME
(Recording time on P2 card)
One clip
To stop the Interval recording mode
AJ-HPX3100G(VQT3A79)_E.book 40 ページ 2010年9月17日 金曜日 午後9時21分