


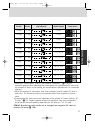
81
Diopter Adjustment/LCD Illuminator
• Diopter adjustment
The finder diopter enables near- or far-sighted photographers to
adjust the eyepiece diopter to suit their vision.
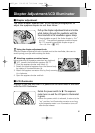
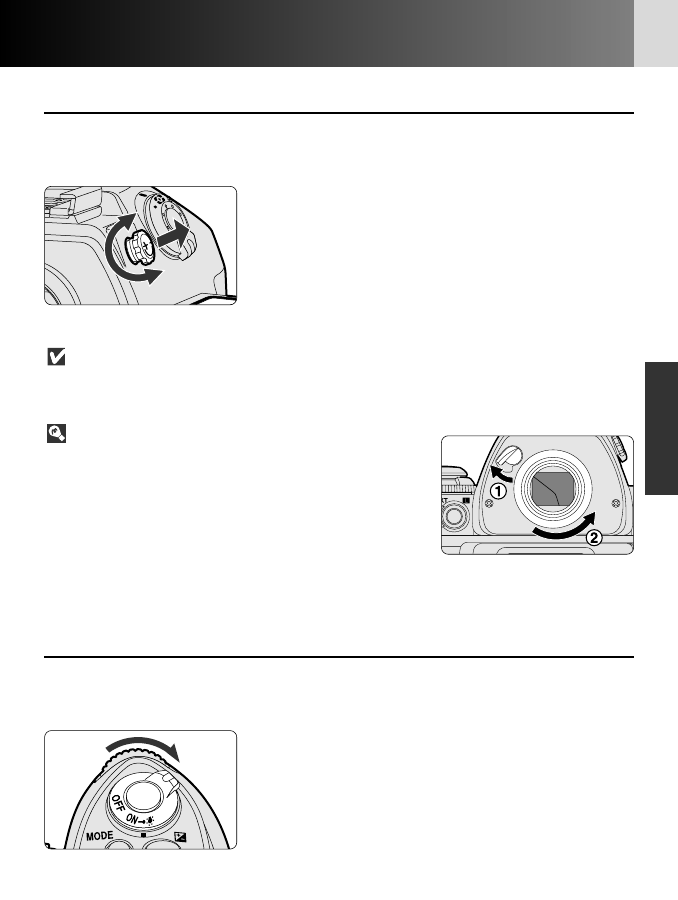
Pull up the diopter adjustment knob and rotate
while looking through the viewfinder until the
focus brackets in the viewfinder appear sharp.
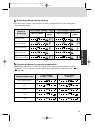
• The adjustable range of the finder diopter is –2m
–1
to +1m
–1
. Five optional eyepiece correction lenses
DK-17C provide a viewfinder diopter range of
–3m
–1
to +2m
–1
(x 167).
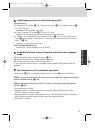
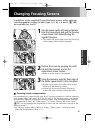
Using the diopter adjustment knob
Since the diopter adjustment knob is located next to the viewfinder, take care to
avoid injuring your eye while rotating the knob.
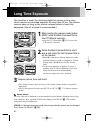
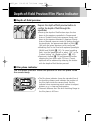
Attaching eyepiece correction lenses
Before attaching an eyepiece correction lens (optional;
x 167), remove the viewfinder eyepiece DK-17.
1. Close the eyepiece shutter and unlock 1.
2. Detach the supplied eyepiece from the camera body
by rotating it counterclockwise 2.
3. Attach the eyepiece correction lens by firmly screwing
it in clockwise.
4. Open the eyepiece shutter and lock.
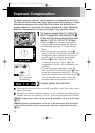
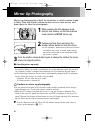
• LCD illuminator
Displays in the top and rear LCD panels can be confirmed in the dark
with the LCD illuminator.
Rotate the power switch to Œ. The exposure
meter turns on and the LCD panel is illuminated
in green.
• When the power switch is released, it returns to the
“on” position, but illumination remains on as long
as the exposure meter is on. Illumination turns off
after shutter release.
Detailed Operation
P930_En 04.10.19 7:19 PM Page 81