


Chapter 7 Menu Displays and Detailed Settings
107
7-1 Menu Organization and Operation
Returning to the TOP menu from other
menus
There are two methods.
• Align the b mark with “TOP” at the top right of the
menu page, and press the MENU knob.
• Push the CANCEL/PRST / ESCAPE switch down to the
ESCAPE position repeatedly until the TOP menu
appears.
Menu operations in the USER menu
This section explains operations on the USER menu. But
the operations are the same as those on menus other than
the USER menu. Also, if the optional extension boards are
not installed in your camcorder, some items on the USER
menu pages are not displayed. But the operations are the
same as those on the menus other than the USER menu.
To carry out menu operations in the USER menu, proceed
as follows.
1
Switch the MENU ON/OFF switch from OFF to ON.
The USER menu normally appears. If it does not, in
the TOP menu select USER, and press the MENU
knob.
(For the PDW-530P/510P, the DF/NDF item is not
included.)
If the USER menu has been used before, the last
accessed page appears. In this case, go to step 2.
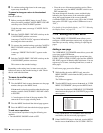
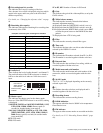
If this is the first time the USER menu has been
displayed, the CONTENTS page of the USER menu
appears. In this case, follow the procedure below.
1 Turn the MENU knob to move the b mark to the
desired page number.
2 Press the MENU knob.
The selected page is displayed. Go to step 4.
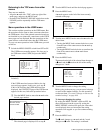
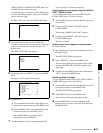
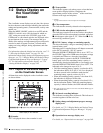
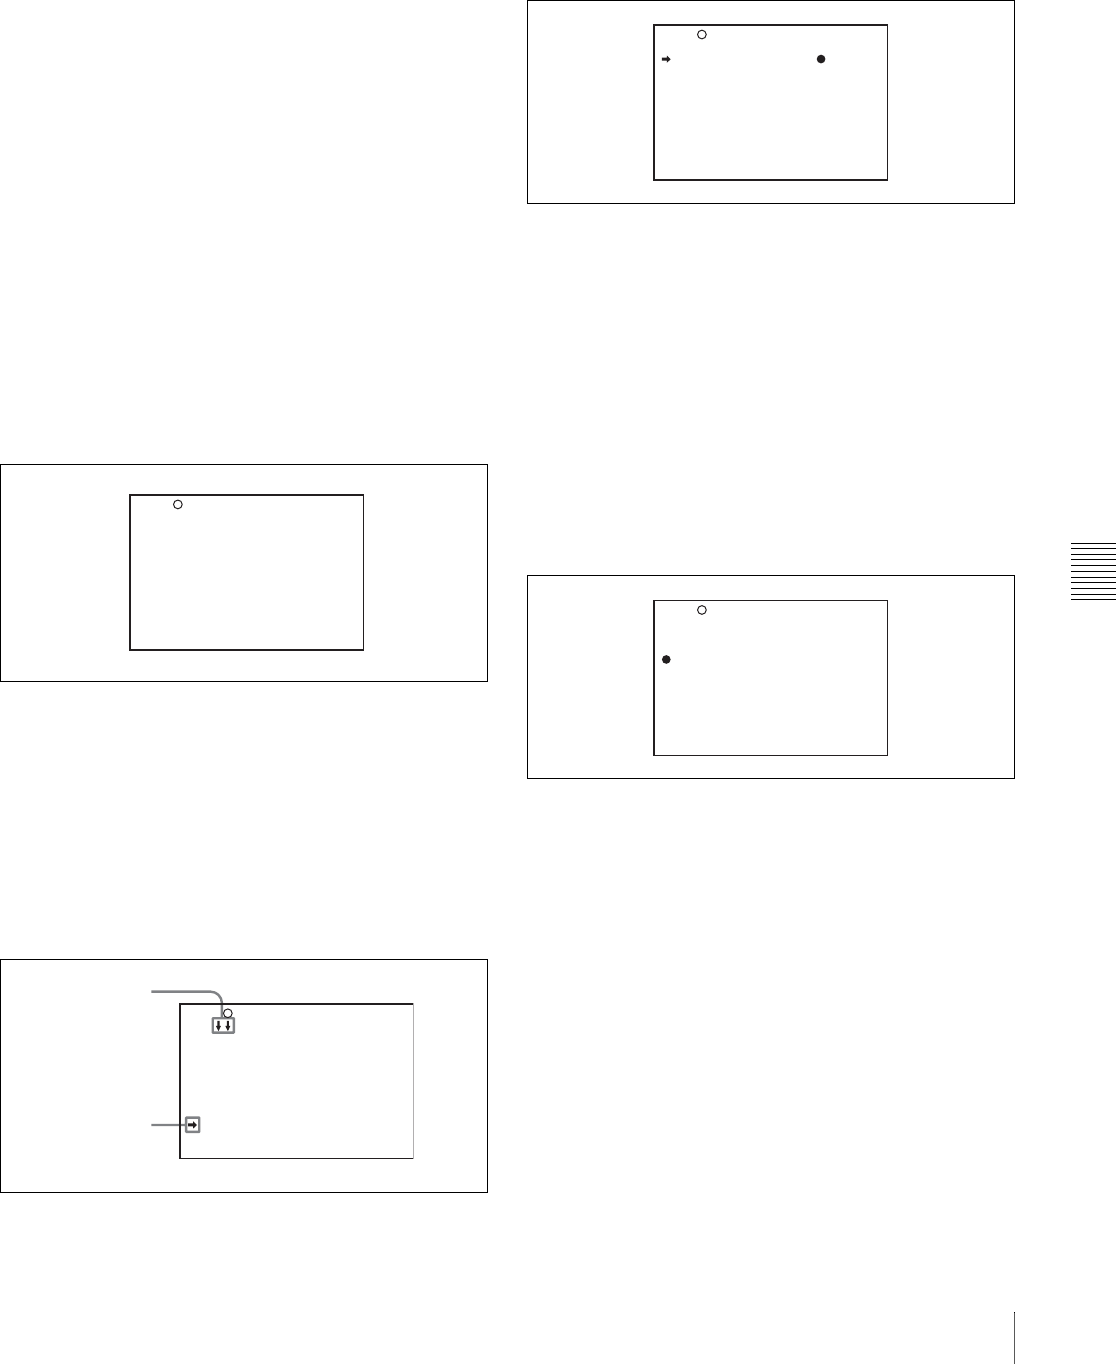
2
Turn the MENU knob until the desired page appears.
3
Press the MENU knob.
A b mark appears on the left of the item currently
selected on the page.
4
Turn the move MENU knob to move the b mark to the
desired item.
• Turning the MENU knob counterclockwise as seen
from the front of the camera moves the b mark up
continuously.
• Turning the MENU knob clockwise as seen from the
front of the camera moves the b mark down
continuously.
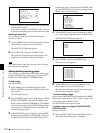
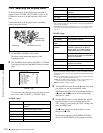
5
Press the MENU knob.
The b mark on the left of the selected item changes to
a z mark and the z mark on the left of the setting
changes to a ? mark.
6
Turn the MENU knob to change the setting.
Before going to the next step, you can cancel a change
or return to the standard settings. For this operation,
see the next item “To cancel a change or return to the
standard settings” on page 108.
To interrupt changing the settings
By setting the MENU ON/OFF switch to OFF, the
menu disappears from the screen. By setting the
MENU ON/OFF switch to ON again, the values that
were displayed when you interrupted the setting
operations will reappear so you can continue making
settings.
7
Press the MENU knob.
The z mark changes to a b mark and the ? mark
changes to a z mark. The setting is confirmed.
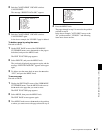
U03 FUNCTION1
ASSIGN SW <1> : ATW
ASSIGN SW <2> : OFF
ASSIGN SW <3> : OFF
ASSIGN SW <4> : OFF
TURBO SW : TURBO
DF/NDF : DF
CACHE/INTVAL REC: OFF
TOP
U00 CONTENTS
01.OUTPUT
02.TEST OUT
03.FUNCTION 1
04.VF DISP 1
05.VF DISP 2
06.'!'LED
07.MARKER 1
08.GAIN SW
09.VF SETTING
10.AUTO IRIS
TOP
This indicates that
the menu screen
can be scrolled.
b mark
U08 GAIN SW
GAIN LOW : 0db
GAIN MID : 9db
GAIN HIGH : 18db
GAIN TURBO : 42db
TURBO SW IND. : OFF
TOP
U08 GAIN SW
GAIN LOW : 0db
GAIN MID : 9db
GAIN HIGH :? 18db
GAIN TURBO : 42db
TURBO SW IND. : OFF
TOP