


Chapter 7 Menu Displays and Detailed Settings
134
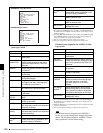
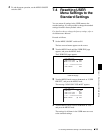
7-3 Adjustments and Settings from Menus
5
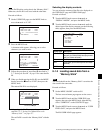
Turn the MENU knob to display “ENABL”, then press
the MENU knob.
The z mark changes to a b mark and the ? mark
changes to a z mark.
6
To end the menu operation, set the MENU ON/OFF
switch to OFF.
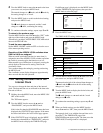
Note
Before enabling automatic acquisition of the IP address,
check to be sure that this unit is connected to a network
with a network cable.
The acquired IP address is displayed in the “IP
ADDRESS” line of the NETWORK page.
If an IP address could not be acquired, “0.0.0.0” is
displayed. In this case, contact your network
administrator.
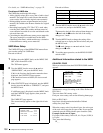
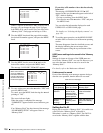
Setting the IP address, subnet mask, and
default gateway
The unit is shipped from the factory with the following
settings.
IP ADDRESS: 192.168. 1.10
SUBNET MASK: 255.255.255. 0
DEF. GATEWAY: 0. 0. 0. 0
Proceed as follows to change the settings.
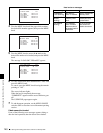
1
Carry out steps 1 to 3 in “Enabling automatic
acquisition of the IP address” (page 133) to display
the NETWORK page of the MAINTENANCE menu.
2
Turn the MENU knob to move the b mark to “IP
ADDRESS”, then press the MENU knob.
The IP ADDRESS setting window appears.
3
Move the b mark to the value that you want to change,
then press the MENU knob.
The b mark changes to a ? mark.
4
Turn the MENU knob to display the desired value,
then press the MENU knob.
The ? mark changes to a b mark.
To cancel the change and restore the standard
setting
Push the CANCEL/PRST/ESCAPE switch to the
CANCEL/PRST side.
For details, see 7-1-3 “Basic Menu Operations” (page
106).
5
Repeat steps 3 and 4 to set the remaining values.
6
When you are finished, move the b mark to SET, then
press the MENU knob.
7
Turn the MENU knob to move the b mark to
“SUBNET MASK”, then press the MENU knob.
SUBNET MASK setting window appears.
8
Carry out steps 3 to 6 to set the subnet mask.
9
Turn the MENU knob to move the b mark to “DEF.
GATEWAY”, then press the MENU knob.
The DEF. GATEWAY setting window appears.
10
Repeat steps 3 to 6 to set the default gateway.
11
To end the menu operation, set the MENU ON/OFF
switch to OFF.
Setting the communications speed
Set the communications speed by choosing AUTO,
10Mbps, or 100Mbps from the menu.
The factory default setting is “AUTO”.
Proceed as follows.
1
Carry out steps 1 to 3 in “Enabling automatic
acquisition of the IP address” (page 133) to display
the NETWORK page of the MAINTENANCE menu.
2
Turn the MENU knob to move the b mark to “LINK
SPEED”, then press the MENU knob.
3
Turn the MENU knob to move the b mark to the
desired value, then press the MENU knob.
4
To end the menu operation, set the MENU ON/OFF
switch to OFF.
Setting the communications mode (full
duplex or half duplex)
Set the communications speed by choosing AUTO, FULL
(full duplex) or HALF (half duplex) from the menu.
The factory default setting is “AUTO”.
Proceed as follows.
1
Carry out steps 1 to 3 in “Enabling automatic
acquisition of the IP address” (page 133) to display
the NETWORK page of the MAINTENANCE menu.
2
Turn the MENU knob to move the b mark to
“DUPLEX”, then press the MENU knob.
3
Turn the MENU knob to move the b mark to the
desired mode, then press the MENU knob.