


Chapter 3 Recording and Playback
46
3-2 Recording
3-2 Recording
3-2-1 Basic Procedures
This section describes the basic procedures for shooting
and recording.
Before a shooting session, ensure that the camcorder is
functioning properly.
For details, see 10-1 “Testing the Camcorder Before
Shooting” on page 163.
Recording format settings (PDW-530/530P
only)
With the PDW-530/530P you can select the recording
formats for each of video and audio.
Note that it is not possible to use different recording
formats on a single disc.
Be sure to select the same format as the existing recording
if you use a disc on which material is recorded, or
otherwise use a different disc.
For details of the setting operations, see 5-1-1 “Setting the
Video Recording Format” on page 75 and see 5-1-2
“Setting the Audio Recording Format” on page 76.
Thumbnail image setting
As required, you can select the frame to display as the
thumbnail image of a clip.
(The factory default setting is to display the first frame in
the clip as the thumbnail image.)
See 5-7 “Setting the Thumbnail Image” on page 92 for
more information about how to make this setting.
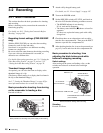
Basic procedure for shooting: from turning
on the camcorder to loading a disc
Proceed as follows.
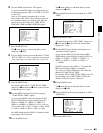
Basic procedure for shooting: from power supply to disc loading
1
Attach a fully charged battery pack.
For details, see 9-1 “Power Supply” on page 147.
2
Turn on the POWER switch.
3
Set the DISP SEL switch to STATUS, and check on
the color LCD that the following conditions are met.
• The HUMID indicator is not showing.
If it is, wait until it disappears.
• The battery status indicator (x) shows at least five
segments.
If it does not, replace the battery pack with a fully
charged one.
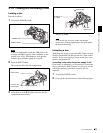
4
Check that there are no obstructions such as cables
near the disc compartment lid. Then press the EJECT
button to open the disc compartment lid.
5
After checking that the disc is not write-protected (see
page 42), load it and close the disc compartment lid.
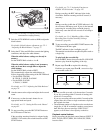
Basic procedure for shooting: from
adjusting the black balance and white
balance to stopping recording
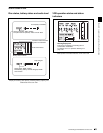
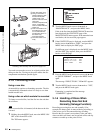
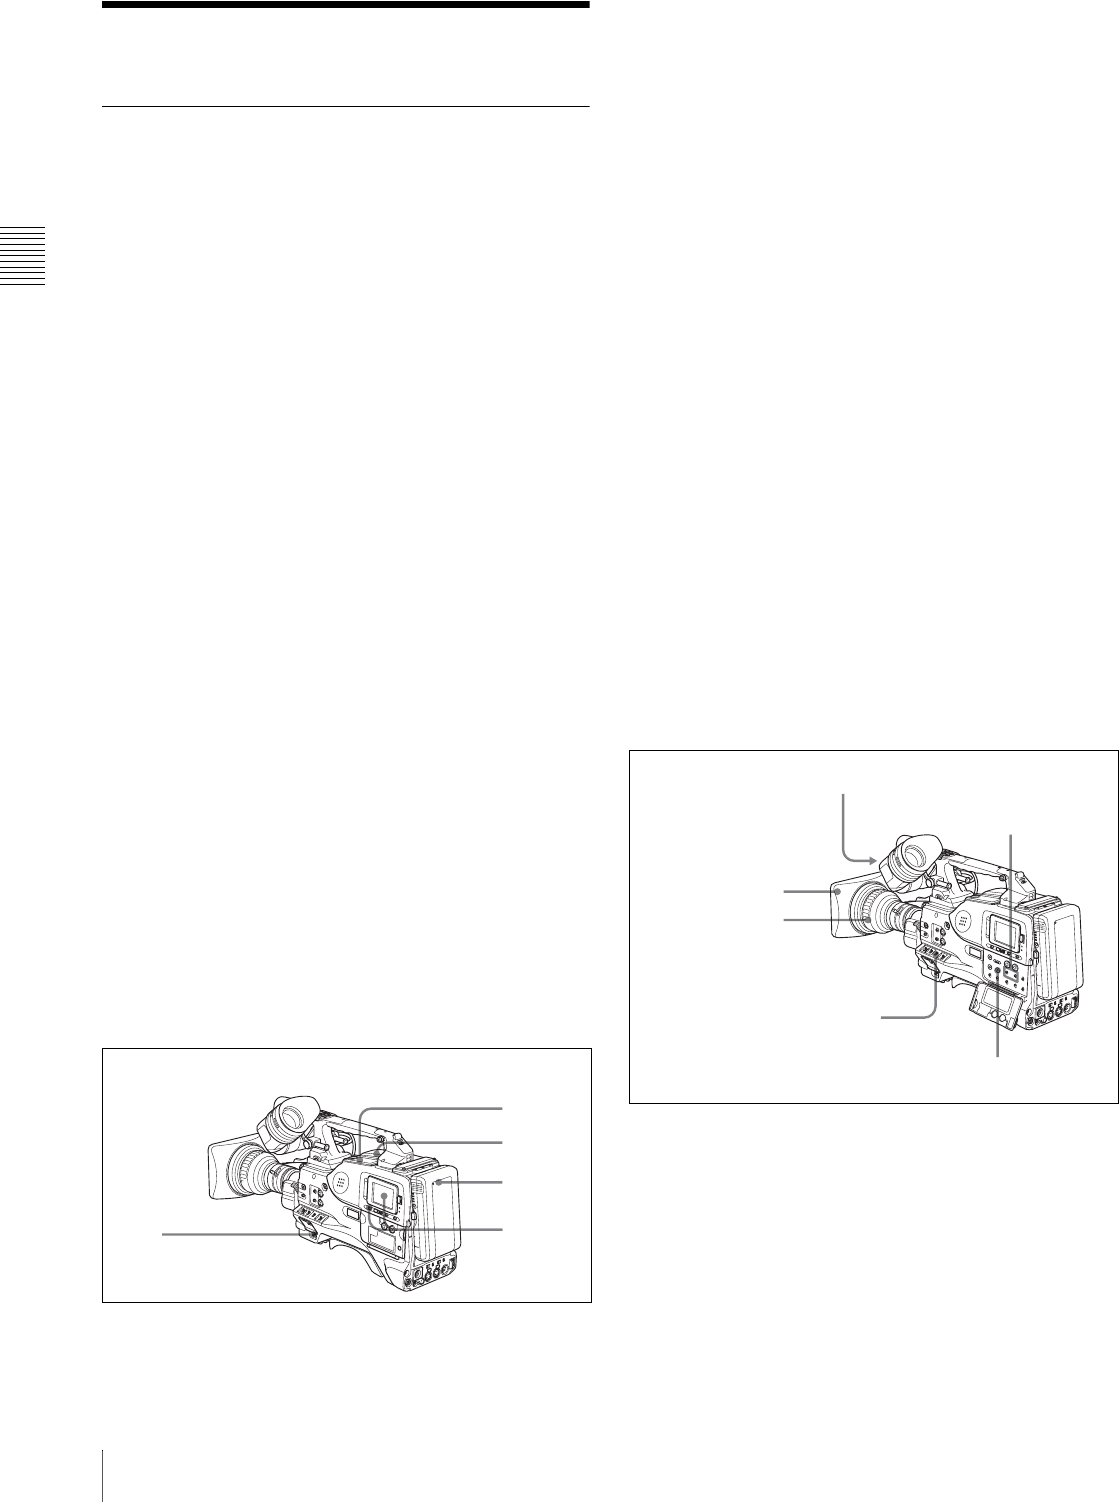
Switch settings
After turning on the power and loading a disc, set the
switches and selectors as shown below and begin
operation.
Switch and selector settings before shooting
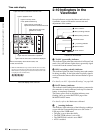
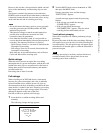
Shooting
Proceed as follows.
2
4
5
1
3
DISPLAY: ON
AUDIO SELECT
CH-1/CH-2: AUTO
Iris: Automatic
Zoom: Automatic
OUTPUT/DCC: CAM, DCC ON
F-RUN/SET/R-RUN: F-RUN or R-RUN
(set as needed)