


Getting Started
1780R-Series Operator’s Manual
1–5
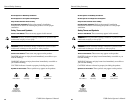
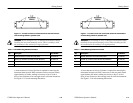
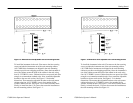
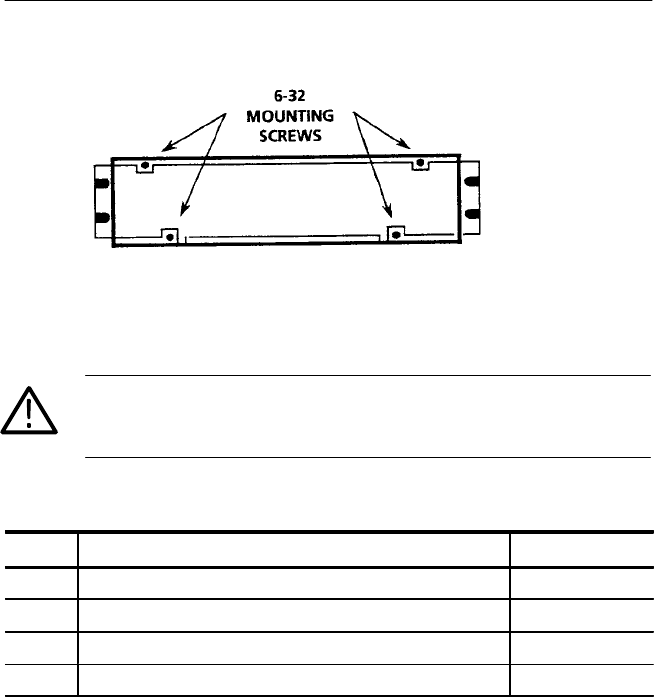
Figure 1–1: Location of the four screws that secure the instrument to
rack-mounting cabinet or portable case
WARNING. Do not attempt to carry a cabinetized instrument without
installing the rear-panel mounting screws. There is nothing to hold
the instrument in the cabinet if it is tipped forward.
Table 1–1: Rack-Mounting Hardware Included
Qty Description Part Number
2 Bracket, Extension: 2.5 X 8.06 X 0.06, Steel 407-3752-00
2 Nut Bar: (3) 10-32 X 3.0 X 0.375 X 0.125, Aluminum 381-0251-00
12 Screw, Machine: 10-32 X 0.625, Steel 212-0577-00
4 Washer, Flat: 0.203 ID X 0.625 OD X 0.062, Steel 210-1061-00
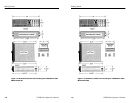
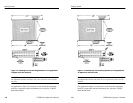
A front clearance of at least 18 inches is required for removing the
instrument from the rack. BNC connectors on the rear panel extend
approximately 0.6 inches, making it necessary to have 1 inch or
more of rear clearance to have enough room to cable the instrument.
See Figure 1–2 for rack-mounting dimensions.
Getting Started
1780R-Series Operator’s Manual
1–5
Figure 1–1: Location of the four screws that secure the instrument to
rack-mounting cabinet or portable case
WARNING. Do not attempt to carry a cabinetized instrument without
installing the rear-panel mounting screws. There is nothing to hold
the instrument in the cabinet if it is tipped forward.
Table 1–1: Rack-Mounting Hardware Included
Qty Description Part Number
2 Bracket, Extension: 2.5 X 8.06 X 0.06, Steel 407-3752-00
2 Nut Bar: (3) 10-32 X 3.0 X 0.375 X 0.125, Aluminum 381-0251-00
12 Screw, Machine: 10-32 X 0.625, Steel 212-0577-00
4 Washer, Flat: 0.203 ID X 0.625 OD X 0.062, Steel 210-1061-00
A front clearance of at least 18 inches is required for removing the
instrument from the rack. BNC connectors on the rear panel extend
approximately 0.6 inches, making it necessary to have 1 inch or
more of rear clearance to have enough room to cable the instrument.
See Figure 1–2 for rack-mounting dimensions.