


Advanced Guide
Troubleshooting
Contents
>
Routine Maintenance
>
When Printing Becomes Faint or Colors Are Incorrect
> Aligning the Print Head
C098
Aligning the Print Head
If printed ruled lines are misaligned or print results are otherwise unsatisfactory, adjust the print head
position.
You need to prepare: a sheet of A4 or Letter-sized Canon Matte Photo Paper MP
-101
Note
If the remaining ink level is low, the print head alignment sheet will not be printed correctly.
Replace the ink tank whose ink is low.
See
Replacing an Ink Tank
.
If you run out of supplied paper (Canon Matte Photo Paper MP-101) or the specified Canon genuine
paper is not immediately available or obtainable, you can use plain paper and align the Print Head
manually.
Refer to the on-screen manual: Advanced Guide
.
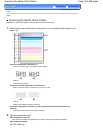
The print head alignment pattern is printed in black and blue.
Aligning the Print Head without a computer
You can also align the Print Head from the printer itself using the
RESUME/CANCEL
button.
1. Make sure that the power is turned on, and load a sheet of A4 or Letter-sized supplied paper or
Canon Matte Photo Paper MP-101 in the Rear Tray. Load it with the printing side (whiter side)
facing you in the Rear Tray.
2. Open the Paper Output Tray gently, and extend the Output Tray Extension to open.
If the Inner Cover is open, close it.
3. Hold down the
RESUME/CANCEL
button until the
POWER
lamp flashes green four times, then
release it immediately.
The print head alignment sheet will be printed and the printer will adjust the print head position
automatically.
Do not perform any other operations until the printer completes the printing of the print head
alignment pattern.
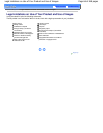
1. Make sure that the power is turned on.
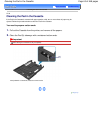
2. Load a sheet of A4 or Letter-sized supplied paper or Canon Matte Photo Paper MP-
101 in the Rear Tray.
Load the paper with the print side (whiter side) facing you in the Rear Tray.
Important
You cannot use the Cassette to align the Print Head automatically. Be sure to load paper in the
Rear Tray.
3. Open the Paper Output Tray gently, and extend the Output Tray Extension to open.
Important
If the Inner Cover is open, close it.
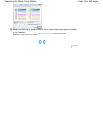
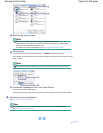
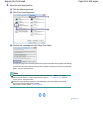
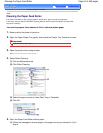
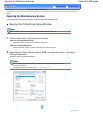
4. Open the printer driver setup window.
See
Opening the Printer Driver Setup Window
.
Page 59 of 468 pagesAligning the Print Head