


Selecting a Photo
Editing
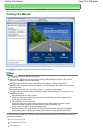
Printing
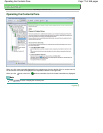
Correcting and Enhancing Photos
Using the Auto Photo Fix Function
Using the Red-Eye Correction Function
Using the Face Brightener Function
Using the Face Sharpener Function
Using the Digital Face Smoothing Function
Using the Blemish Remover Function
Adjusting Images
Correct/Enhance Images Window
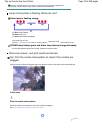
Creating Still Images from Videos
Video Frame Capture/Movie Print Window
Downloading Images from Photo Sharing Sites
Import Photos from Photo Sharing Sites Window
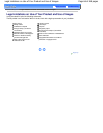
Questions and Answers
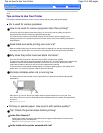
How Can I Move (or Copy) the Saved File?
Which Side of the Displayed Image Does the Printing
Start from?
How Do I Print with Even Margins?
What Is "C1" or "C4"?
Photo Print Settings
Printing Labels on Discs Directly
Printing Vivid Photos
Reducing Photo Noise
Cropping Photos (Photo Print)
Printing Dates on Photos (Photo Print)
Printing Multiple Photos on One Page
Printing an Index
Printing ID Photos (ID Photo Print)
Printing Photo Information
Saving Photos
Opening Saved Files
Other Settings
Changing Layout
Changing Background
Adding Photos
Swapping Positions of Photos
Replacing Photos
Changing Position, Angle and Size of Photos
Cropping Photos
Framing Photos
Printing Dates on Photos
Attaching Comments to Photos
Adding Text to Photos
Saving
Page 72 of 468 pagesiP4800 series Advanced Guide