


57
Recording
Chapter 4 Recording and Playback
Recording with the HDSDI remote
control function
This section explains the settings required for recording in
HDSDI remote control mode, and how the unit operates in
this mode.
The unit (camcorder) that controls this unit must also
support HDSDI remote output.
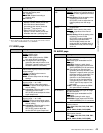
Settings
Set setup menu item 214 REMOTE INTERFACE to
“SDI”, and set the remote control switch on the front panel
to “REMOTE”.
This unit enters HDSDI remote control mode, in which it
is controlled by command packets received via the SD/
HDSDI INPUT connector.
The following limitations apply in HDSDI remote control
mode.
• Commands received via the REMOTE(9P) connector
are ignored.
• Recording and playback operations on the front panel
are disabled, except for the EJECT button.
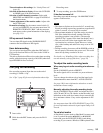
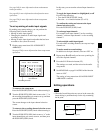
Monitor display in HDSDI remote control mode
“RM-SDI” appears in the remote interface display area
(see page 26) of the monitor. This display lights if
command packets are embedded into HDSDI signals, and
flashes if they are not. However, the “RM-SDI” continues
to flash until the time the controlling camcorder is powered
on and the time that the REC button is pressed on the
camcorder.
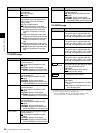
Recording operation
When a recordable disc is inserted, recording (or stop) is
executed according to the REC (or STOP) command
embedded into the HDSDI signals.
Recording stops automatically when the end of the disc is
reached.
When HDSDI signals are interrupted during
recording
Recording stops if HDSDI signals are interrupted during
recording, for example because the HDSDI cable is
disconnected or the controlling camcorder is powered off.
When HDSDI signal input is restored, the unit resumes
operation according to the embedded REC or STOP
command.
Exchanging discs
Even during recording, it is possible to eject discs by
pressing the EJECT button on the front panel. After a disc
is exchanged, the unit resumes operation according to the
embedded REC or STOP command.
This unit begins recording operation about one second
after the camcorder.
Recording with the Clip Continuous
Rec function
Normally, a clip is generated as an independent file every
time recording starts and stops. The Clip Continuous Rec
function allows you to continue recording to the same clip
until the function is stopped or turned off, regardless of
how many times recording starts and stops. This is
convenient if you want to avoid generating a large number
of short clips, or if you want to record without worrying
about the limit on the number of clips (maximum 300). A
Rec Start essence mark is recorded whenever recording
starts, which makes it easy to find the recording start points
(see page 77).
A new clip may be created the next time you start
recording if it is impossible to continue recording to the
same clip because of signal noise or some other reason.
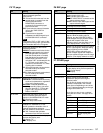
To enable the function
Set setup menu item 150 REC MODE to “clip continuous
rec”.
For details about operation, see “Basic menu operations”
(page 126).
To record
Send a “REC” command from a controlling device
connected to either of the following connectors.
• REMOTE(9P) connector
• SD/HDSDI INPUT connector (Put the unit into HDSDI
remote control mode.)
To stop recording
Send a “REC PAUSE” command.
To stop the function
Do one of the following to stop the Clip Continuous Rec
function. (A new clip will be generated the next time you
start recording.)
• Perform a clip operation (lock, delete, or rename a clip)
• Make a network or FAM connection
• Eject the disc
Note
Note
Note
Note