On-screen Manual
> Scanning Guide > MP Navigator EX Screens > Scan Settings Dialog Box (Film)
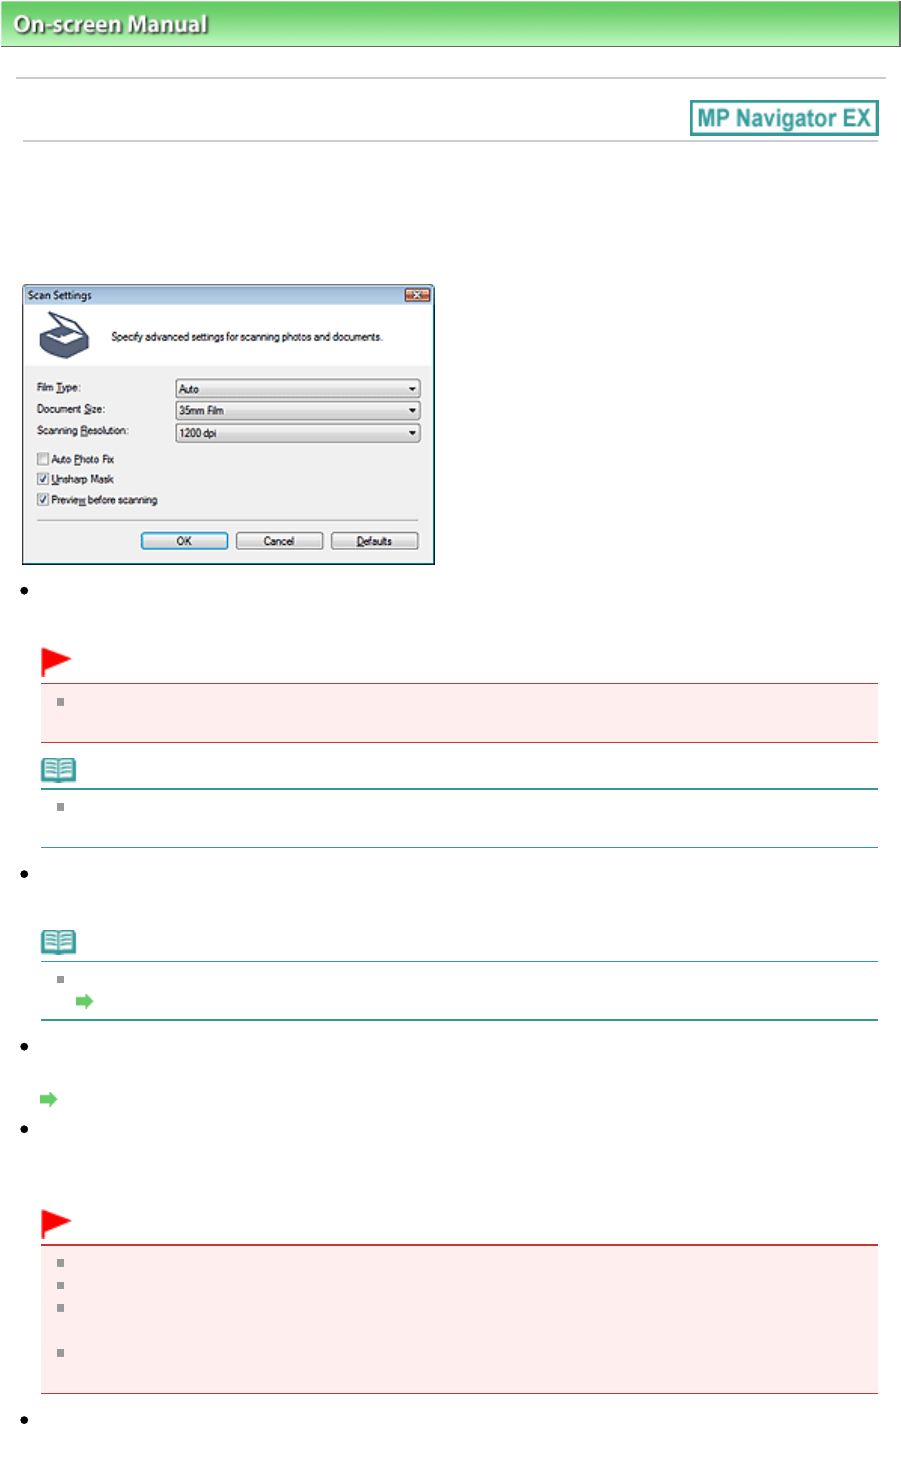
Scan Settings Dialog Box (Film)
The Scan Settings dialog box opens when you click Specify... in the Scan/Import window.
In the Scan Settings dialog box, you can make advanced scan settings.
Film Type
Select the type of film to be scanned.
Important
Film may not be scanned correctly when Auto is selected. In that case, select the type of film and
scan again.
Note
To scan black and white film, it is recommended that you select Black and White Negative Film or
Black and White Positive Film.
Document Size
35mm Film is displayed.
Note
To scan 120 Format Films, scan from the Advanced Mode tab of ScanGear (scanner driver).
Scanning Film in Advanced Mode
Scanning Resolution
Select the resolution at which to scan film.
Resolution
Auto Photo Fix
Select this checkbox to automatically analyze the captured scene (landscape, night scene, etc.) and
apply suitable corrections.
Important
When this checkbox is selected, the files can be saved in JPEG/Exif or PDF format only.
Scanning may take longer than usual when this checkbox is selected.
You cannot select this checkbox when Film Type is Black and White Negative Film or Black and
White Positive Film.
The color tone may change from the source image due to corrections. In that case, deselect the
checkbox and scan.
Unsharp Mask
Select this checkbox to emphasize the outline of the subjects and sharpen the image.
Page 106 of 334 pagesScan Settings Dialog Box (Film)


