


8.
Click Scan.
Scanning Multiple Documents in Whole Image View
Follow these steps if thumbnails are not displayed correctly when previewed or if you want to scan
multiple documents as a single image.
Note
Positions of slanted documents are not corrected in whole image view.
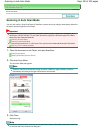
1.
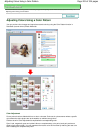
After previewing images, click
(Thumbnail) on the Toolbar.
Switch to whole image view.
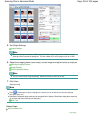
Note
When the whole image is displayed, the icon changes to
(Whole Image).
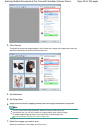
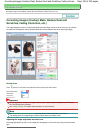
2.
Adjust the scan areas (cropping frames).
Adjust the size and position of the cropping frame (scan area) on the preview image. You can also
create two or more cropping frames.
If an area is not specified, the document will be scanned at the document size (Auto Crop). If an area
is specified, only the portion in the specified area will be scanned.
Adjusting Cropping Frames
3.
Set Destination.
4.
Set Output Size.
5.
Set Image corrections as required.
6.
Click Scan.
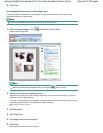
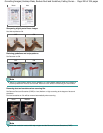
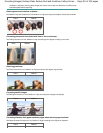
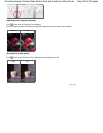
Areas framed by broken lines are scanned.
Page 196 of 334 pagesScanning Multiple Documents at One Time with ScanGear (Scanner Driver)