


136
Others
Make sure that peripheral devices are used in accordance with their
operating environment.
Compatible Network Cameras
Memo :
●
When VN-V685 and VN-V686B are registered to NVR, do not
enable the audio device although it is displayed. If it is enabled,
camera images may not be displayed correctly.
●
VN-V686WPC may be recognized by NVR as VN-V686B, but
this is normal. WPC works normally even if the audio device is
enabled.
●
When VN-X35 is used, make sure that the firmware version of
VN-X35 is V2.00 or a newer version.
●
When sending out audio data to VN-V26U, make sure that the
firmware version of VN-V26U is 1.01 or a newer version.
(VR-N1600U/E)
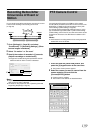
Connecting a UPS
Connecting an uninterruptible power supply (UPS) to the hard disk
will protect it from damage by automatically shutting down all
operations prior to switching off the power supply in the event of a
power failure.
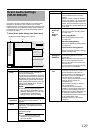
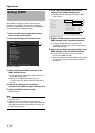
1 Press and hold the [FUNCTION] button, and
press the [3/ ] keypad button at the same time
to start up the [UPS SetUp] screen
2 Select AUPS ModeB and press the [OK] button
3 Connect the UPS communication cable to the
[SERIAL] port on the rear panel
4 Connect the power cable of this unit to the UPS
power output connector
5 Switch on the power of the UPS, followed by the
power of this unit
Note :
●
Consult your nearest JVC dealer or service center for details on
the types of UPS that can be used.
●
Make sure that the UPS communication cable is connected
before switching on the power of this unit.
●
Do not disconnect the communication cable when operations
are in progress.
●
When a power failure occurs while formatting a hard disk or
archiving, subsequent operations may be affected even when a
UPS is connected.
●
The recorded images may not be played back properly if they
are not archived before the power failure. (
A
Page 110)
●
If you are not using a UPS, do not select [UPS SetUp] on the the
[UPS SetUp] screen. Inappropriate selections may affect
subsequent operations.
External Hard Disk Drives
You can connect an external hard disk drive to the [SERIAL]
terminal at the rear of this unit. Up to two hard disks of capacity
500 GB, 1 TB or 2 TB can be combined and used together.
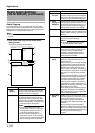
Connecting the External Hard Disk Drive
1 Press and hold the [OPERATE] button for
about2 seconds to turn off the power
2 Turn off the power switch on the rear panel
Note :
●
Make sure that you turn off the power switch.
3 Connect the external hard disk drive to the
[SERIAL] port on the rear panel, and switch on
the power
●
Make sure that you switch on the power to the external
hard disk drive before switching on this unit. The system
may not recognize the external drive if it is not switched on
beforehand.
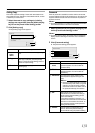
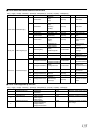
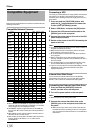
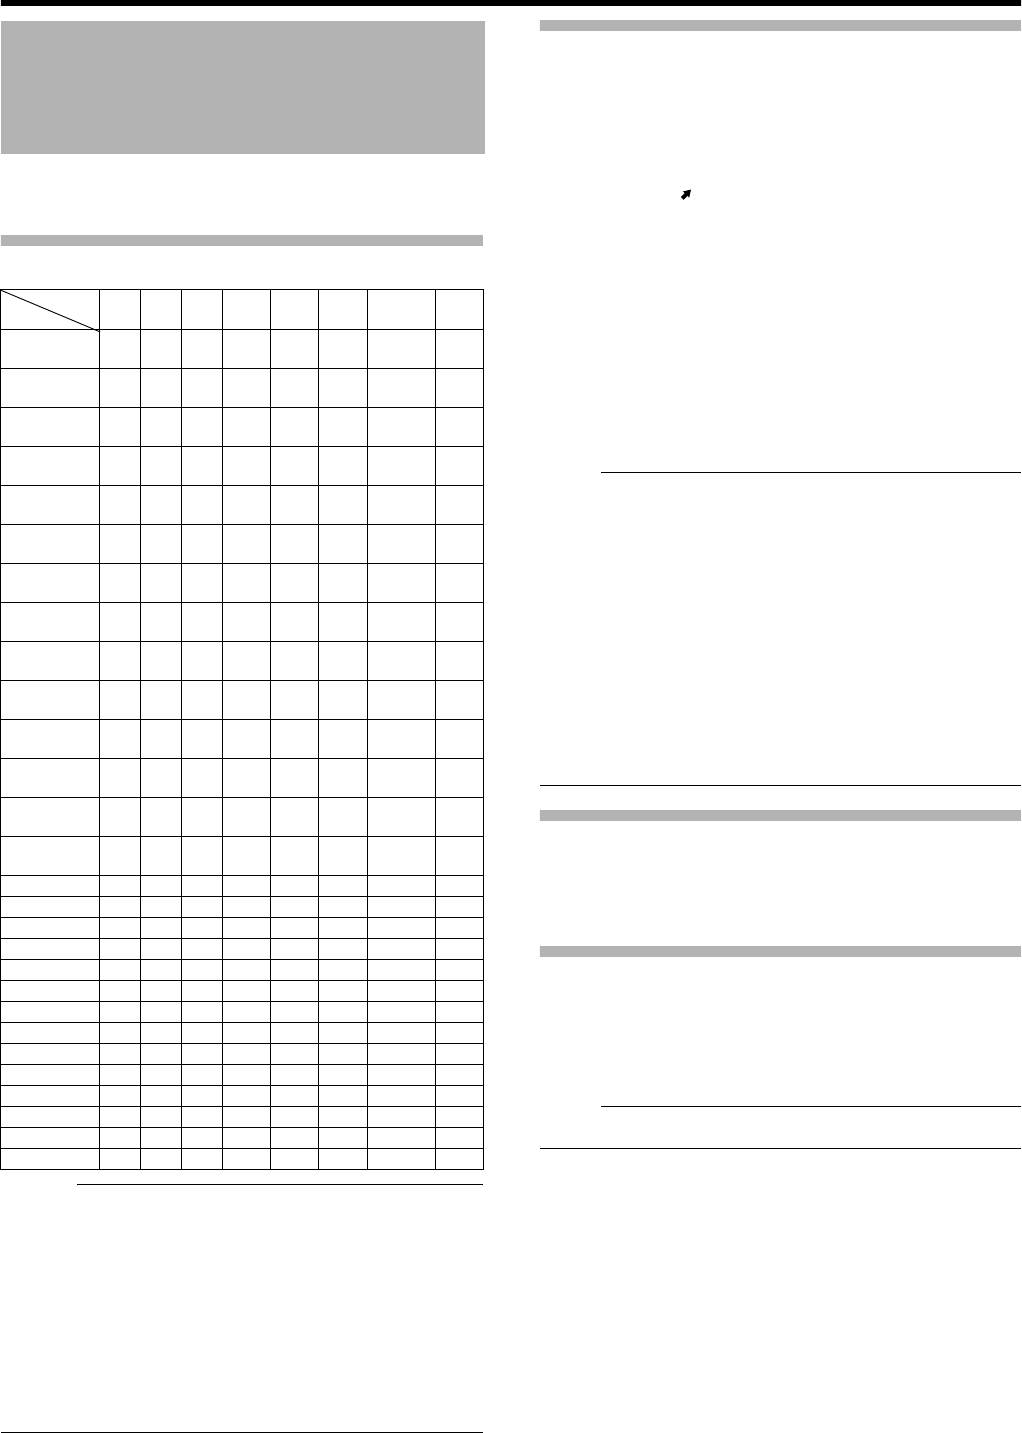
Compatible Equipment
Function
JPG PTZ
Audio
PTZ
Joystick
MPG4
VMD
Event
Bidirectional
Audio
Mega
Pixel
IP cameras
JVC
VN-V25
RR
JVC
VN-V26
RR R R
JVC
VN-V685
RR R R R
JVC
VN-V686
RR R R
JVC
VN-V686B
RR R R R
JVC
VN-V686WPC
RRR R R R R
JVC
VN-V225/VP
RR RRR
JVC
VN-X235/VP
RRRRRRRR
JVC
VN-C20
R
JVC
VN-C655
RR R
JVC
VN-C625
RR R
JVC
VN-E4
RRR R R
JVC
VN-C215
R
JVC
VN-X35
RRRRRRRR
AXIS 206 R
AXIS 207 RRR
AXIS 209FD RR
AXIS 211 RR RR
AXIS 212 RRR R R R
AXIS 213 RR R R R
AXIS 214 RRR R R R
AXIS 216 RR RR
AXIS 225 RRR
Verint S1700 RRR
Verint S1704 RRR
Verint S1708 RRR
Verint S1900 R
Verint S2700E R