


59
Specifying Audio Recording Settings
1
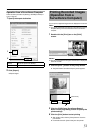
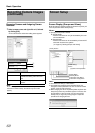
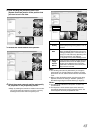
Select [Camera Record Setting] from the main menu
●
The [Camera Recording Administator] screen appears.
Memo :
●
You can also specify audio settings using the following
operation.
A
Click the [+] mark beside the device with an audio source
B
Select the audio source and right-click on it. Click [Edit] and
specify the settings accordingly on the [Audio Device
Settings] screen.
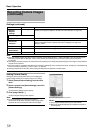
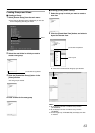
2
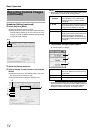
Select an audio source from [Device Manager], and
press the [Settings...] button
●
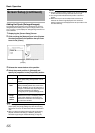
The [Audio Device Settings] screen appears.
●
Audio sound is indicated using a microphone icon.
●
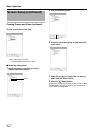
Specify the setting for the following items.
Memo :
●
The audio sound is recorded in the database of the camera
image specified in the [Target Database] item
C
.
●
Audio sound is recorded throughout the interval when the
scheduler of the camera specified in the [Target Database] item
C
is in the online mode.
●
In the case of VR-N1600U/E, audio signals that are input to
[AUDIO IN 1/AUDIO IN 2] on the rear panel are allocated as
[Audio1] and [Audio2] in [NVR](127.0.0.1) on the [Device
Manager].
●
In the case of VR-N900U, audio signals that are input to [AUDIO
IN 1/AUDIO IN 2] on the rear panel are allocated as [Audio1] and
[Audio2] in [N900](192.168.201.12) on the [Device Manager].
Note :
●
If the camera specified in the [Target Database] item
C
is set to
A
Disable
B
, audio sound is not recorded.
●
To play back audio sound of the camera selected using NVR
Viewer, you need to specify the audio source on the [Settings...]
screen under [Camera Record Setting] (
A
Page 55).
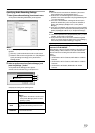
Item Description
A Enabled
Enables/Disables the audio source.
Memo :
●
Right-click on the camera or audio source
in the [Device Manager] section to select
[Disable] or [Edit].
B Device
name
Displays the name of the audio source. You
can overwrite the existing name with a new
one.
C Target
Database
Enables you to specify the camera database
to record audio sound to.
A
B
C
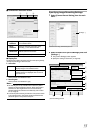
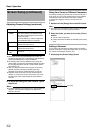
Precautions when enabling the analog audio
source of VR-N1600U/E
When entering a device for [Target Database] in the [Audio1] and
[Audio2] settings of NVR, make use of an input channel that is
after the channel for recording the audio device of the selected
device.
(Example)
X VN-E4 Audio1 B E4 Camera2, NVR Audio1 B VN-E4
Camera1
ן VN-E4 Audio1 B E4 Camera1, NVR Audio1 B VN-E4
Camera2
ן VN-E4 Audio1 B Disable, NVR Audio1 B VN-E4
Camera1