


53
Selecting the Recording Control Mode
In order to record in the recording control mode, you need to
specify the scheduler settings (A Page 53), image recording
settings (A Page 55), and picture quality settings
(A Page 58) in the main menu [Camera Record Setting].
1 Press and hold down the [REC CONTROL]
button while camera recording is stopped
([REC] indicator is off).
●
The [REC CONTROL] indicator lights up and the unit
switches to the recording control mode.
●
Recording will be executed according to the camera
record settings.
Memo :
●
To stop recording, press and hold down the [REC/STOP] button
during recording in a mode other than recording control (the
[REC] indicator lights up or appears blinking). After the light of
the [REC] indicator goes off, press and hold the [REC
CONTROL] button.
●
To exit the recording control mode, press and hold down the
[REC CONTROL] or [REC/STOP] button.
●
Depending on camera status or other circumstances, it may take
a while before recording starts after switching to the recording
control mode.
Note :
●
Do not turn off the power while you are configuring the camera
recording settings.
Selecting the Manual Recording Mode
1 Press the [REC/STOP] button
●
The unit switches to the manual recording mode and
starts recording from all cameras.
●
The [REC] indicator lights up.
Memo :
●
To exit the manual recording mode, press and hold down the
[REC/STOP] button. Upon doing so, the light of the [REC]
indicator goes off.
●
To clear all recording modes, press and hold down the [REC/
STOP] button.
Scheduler Setting
This feature lets you specify when to switch each camera to the
online mode, as well as the online/offline mode of cameras when an
event occurs.
Memo :
●
When in the online mode, the camera executes recording
according to the camera record settings.
●
When in the offline mode, recording is not executed regardless
of the camera record settings.
●
You can specify the time zone during which e-mail alerts are
triggered when motion is detected. You can also specify the time
zone to activate automatic patrolling (
A
Page 93) when using
PTZ cameras.
●
The minimum unit of time that you can specify is 5 minutes.
Note :
●
The online/offline mode has no impact on the manual recording,
[EXT REC IN] signal recording, and emergency recording
modes.
●
Even when
A
offline
B
or
A
Event
B
is specified in the scheduler, the
camera switches to the
A
Online
B
mode if [Start cameras on
remote live requests](
A
Page 106) is specified in [General
Settings] and live images are displayed on the [NVR Viewer].
●
During the interval that is set to
A
Offline
B
, recording will not be
performed even when in the
A
Online
B
mode. During the interval
that is set to
A
Event
B
, recording is performed according to the
recording settings when the unit switches to the
A
Online
B
mode.
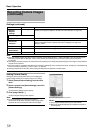
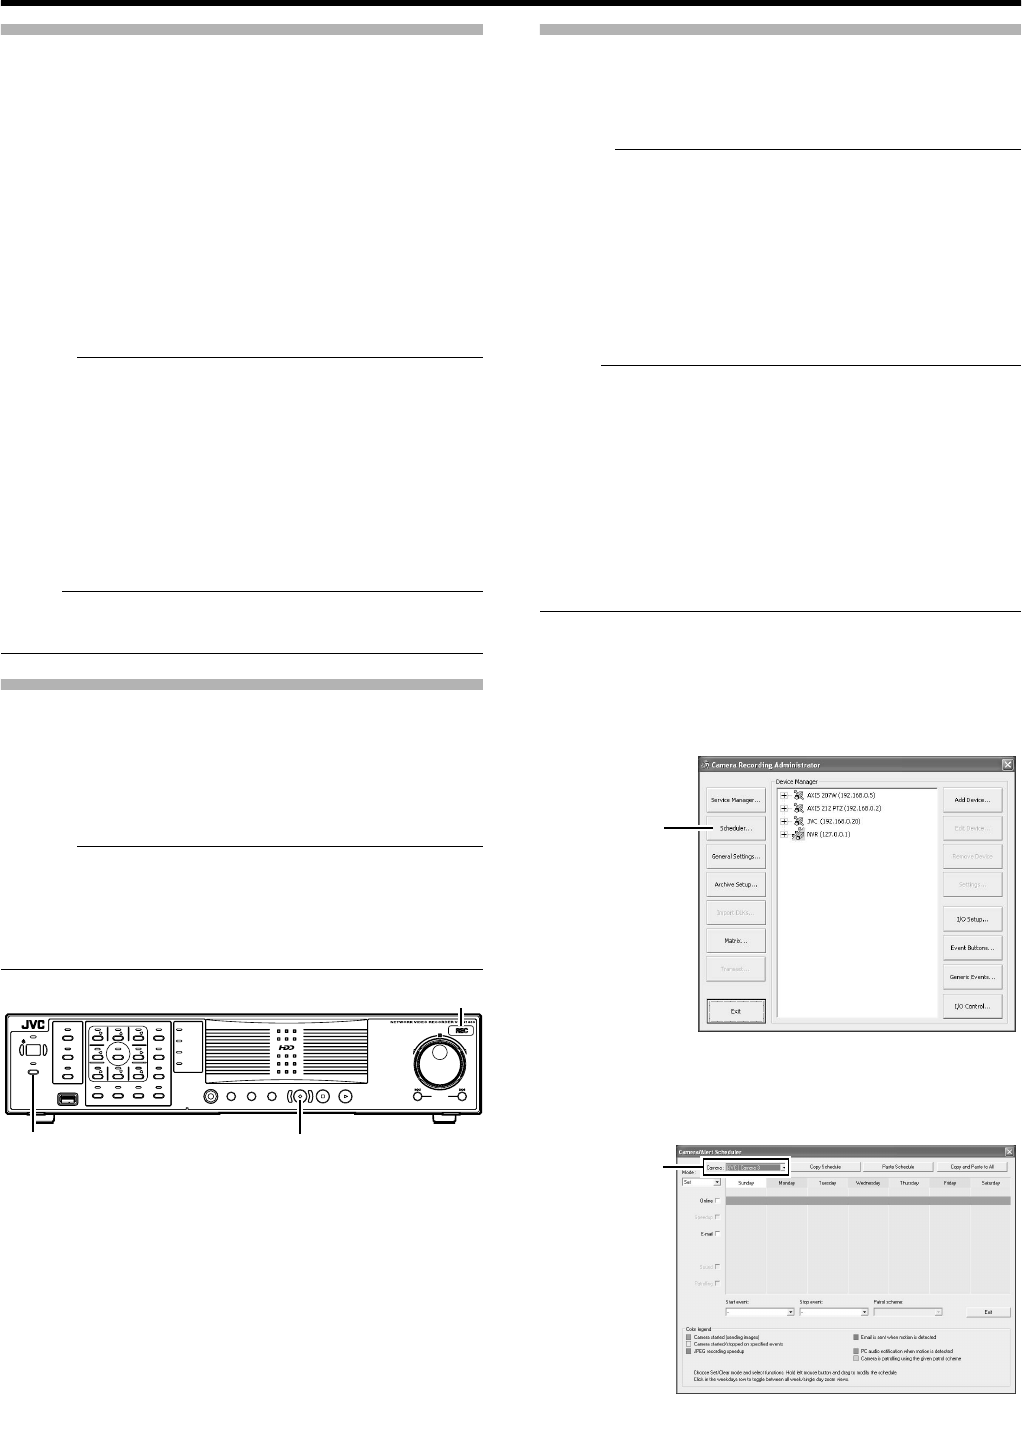
1 Select [Camera Record Setting] from the main
menu
2 Click the [Scheduler...] button
●
The [Scheduler...] screen appears.
3 Select the camera for which you want to set a
schedule from [Camera].
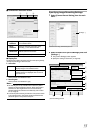
OPERATE
RECCONTROL
LIVE/BROWSE
SELECT
PTZ/PRESET
SERIAL
㧝 㧞 㧟
㧠
㧡
㧢*1/'
㧣
㧥
㧤
CANCEL Z OOMOUT ZOOMIN ENTER
WARNING
ALARM
HDD
LOCK
SEARCHFUNCTION ALARMCLEARKEY REC/STOP STOP(PB) PLAY
SKIP
REV FWD
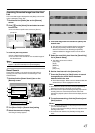
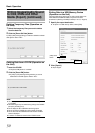
[REC] Indicator
[REC CONTROL] Button/Indicator [REC/STOP] Button
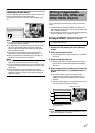
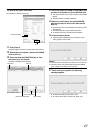
[Camera Recording Administator] Screen
[Scheduler...]
Button
[Scheduler] Screen
Select a Camera