


48
Basic Operation
Burning a CD/DVD (continued)
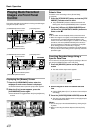
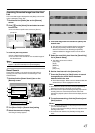
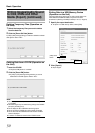
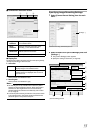
5 Select the export format if you have selected
[AVI/JPEG Export...]
●
Select either [AVI] (movie clip) or [JPEG] (still image).
●
Select whether to add time stamps to the exported
images.
6 Select the required frame rate if you have
selected the [AVI] format
●
Select either the [Full] option, which sends all images to
the AVI file, or the [Half] option, which reduces the size of
the AVI file by sending images on a per second basis
(though images will still be played back in real-time).
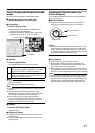
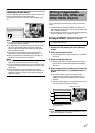
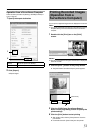
7 If you have selected the [AVI] format, select [AVI
Codec] from the [AVI Codec] list and enter the
file name
●
The default file name is
A
yyyymmdd-hhmmss.avi
B
.
Note :
●
Make sure that the total number of characters used for the
device and camera names does not exceed 61.
●
If recording fails, the recorder may not be able to read the
existing data correctly.
●
New data cannot be added to existing data on a DVD media.
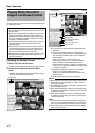
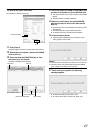
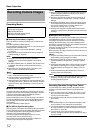
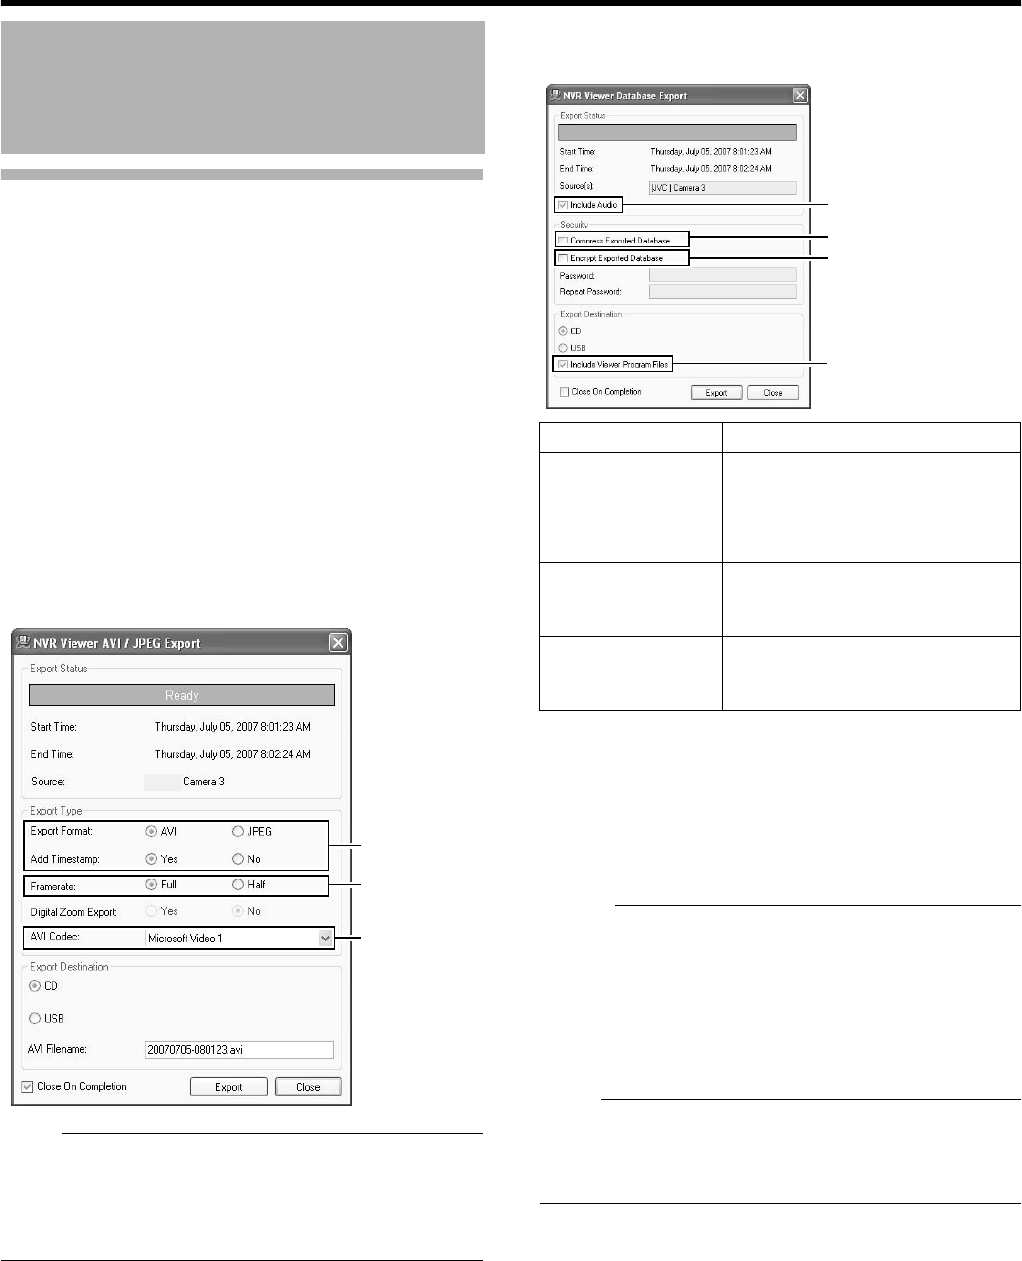
8 If you have selected [Database Export...], setting
of the following items will be enabled.
9 Assign a stand-alone viewer (application for
playing recorded images) to the data to be
exported
●
If you have selected [Database Export...], you are able to
include a stand-alone version of the viewer (application for
playing recorded images) to the data to be exported by
selecting the [Include Viewer Program Files] check box.
Memo :
●
To view the exported data on a PC, double-click the
[Browser.exe] file in the [Exported Images] folder of the USB
memory, CD-R/RW, or DVD-R/RW used for the export. It will
open the Viewer and you can view the exported data.
●
For details on the Viewer, refer to [Export Viewer] (
A
Page 142).
●
DB To include audio sound by exporting in the AVI format, open
the recorded image that has been exported in the DB format on
the Viewer, and export it again in the AVI format on the Viewer.
Note :
●
The [Database Export...] format enables you to export audio
sound together, which is not possible when you export in the
[AVI] or [JPEG] format.
●
The recording frame rate may decline during export.
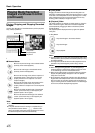
Writing Images/Audio Sound
to CDs, DVDs and Other
Media (Export) (continued)
5
[NVR]
6
7
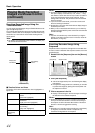
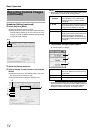
Item Description
A Include Audio
Tick this box if you wish to include
audio sound in the image to export.
(You cannot select this check box if the
audio source does not contain any
data.)
B Compress
Exported
Database
Select this check box to compress the
exported database.
C Encrypt
Exported
Database
Select this check box to encrypt the
exported database. Specify a password
for subsequent decryption.
A
B
C
9