


35
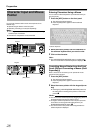
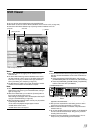
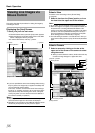
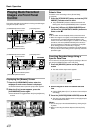
A Event indicator (Left: yellow)
Lights up when events specified in the [Camera Record
Setting] occur. The indicator appears black if event
indication has not been specified for the camera in
question, or if no specified event has occurred.
B Motion indicator (Center: red)
Lights up when motion is detected.
C Online indicator (Right: green)
Blinks every time an image is received from the camera.
D Operating status of the camera (Characters to the left
of the indicator)
●
You can press the [ALARM CLEAR] button to hide the event
indicator and motion indicator.
●
The image bar displays the name of the camera as well as the
name of the device to which the camera is connected.
●
Entering the number of the selected camera switches to an
enlarged display. To return to normal display, enter the camera
number of the enlarged display. You can identify the camera
number of the [Camera Record Setting] screen of the main
menu.
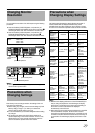
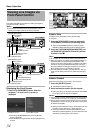
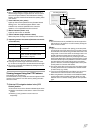
Operating the Camera
PTZ stands for pan, tilt and zoom.
If the camera supports the PTZ functions, you can use the keypad,
and the [16/ENTER](ZOOM IN/ENTER) and [13/CANCEL](ZOOM
OUT/CANCEL) buttons to move the camera up/down (tilt), left/right
(pan), or enlarge/reduce the image (zoom).
`
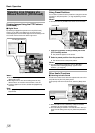
Ⅵ Pan/Tilt
1 Press the [PTZ/PRESET] button to switch the
keypad to the PTZ mode
●
The [PTZ/PRESET] indicator lights up.
●
Press the button to switch between the
A
PTZ Mode
B
(indicator lights up) and
A
Preset Mode
B
(indicator
blinking).
2 Press the 1 to 9 key on the keypad
●
Pans/Tilts in the direction indicated by the arrow on the
keys.
●
Press the [6/HOME](5/HOME) key to move to the home
position.
`
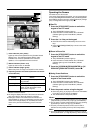
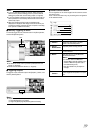
Ⅵ Zoom In/Zoom Out
1 Press the [PTZ/PRESET] button to switch the
keypad to the PTZ mode
●
The [PTZ/PRESET] indicator lights up.
●
Press the button to switch between the
A
PTZ Mode
B
(indicator lights up) and
A
Preset Mode
B
(indicator
blinking).
2
Press the [15/ZOOM IN](ZOOM IN/ENTER) or [14/
ZOOM OUT](ZOOM OUT/CANCEL) button
`
Ⅵ Using Preset Positions
1 Press the [PTZ/PRESET] button to switch the
keypad to the Preset mode
●
The [PTZ/PRESET] indicator starts blinking.
●
Press the button to switch between the
A
PTZ Mode
B
(indicator lights up) and
A
Preset Mode
B
(indicator
blinking).
2 Enter the preset number using the keypad
●
Enter using the [1] to [16] keys in the case of VR-N1600U/
E, and [0] to [9] in the case of VR-N900U.
●
The camera moves to the preset position.
Memo :
●
You can specify a camera number between 10 to 19 by pressing
[10/0] followed by a number from [10/0] to [9]. (VR-N1600U/E)
●
You can specify a camera number between 10 to 19 by pressing
[0] followed by a number from [0] to [9]. (VR-N900U)
●
To specify a number beyond 20, use the mouse to make a
selection from the [Presets:] list in the [PTZ Control] section.
Note :
●
You need to specify the preset positions in advance in order to
use the preset feature. (
A
Page 92 [Defining a Preset Position])
Display Status
Live (Green) When live images are displayed without
being recorded
Recording (Red) When recording is in progress
Stop (Yellow) When images are not acquired from the
camera, or when the camera is in the
offline mode (
A
Page 53)
A
B
C
D
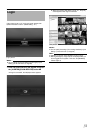
[Live] Screen