


63
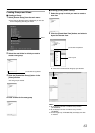
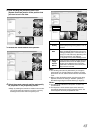
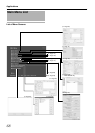
Adding Cameras to a View
1 Select a view
●
The layout of the selected view appears.
2 Click the [+] mark to the left of [Server] under
[System Overview]
●
A list of available cameras appears.
3 Select the camera you want to add from the list,
and drag the camera name over the screen of
the view on the right
●
An image from the selected camera appears together with
the camera name.
●
Repeat the procedure for each camera that you want to
add.
Memo :
●
Images from a total of 16 cameras can be simultaneously
displayed. (VR-N1600U/E)
●
Images from a total of 9 cameras can be simultaneously
displayed. (VR-N900U)
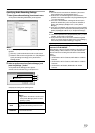
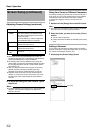
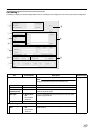
Adjusting Camera Settings
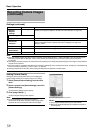
1 Select the camera you want to adjust on the
[Screen Setup] screen
2 Select [Properties]
3 Adjust the following camera settings
accordingly
2
[Server]
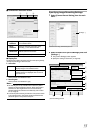
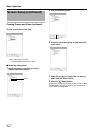
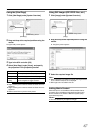
[Screen Setup] Screen
Camera
List
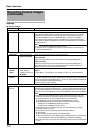
Item Description
A Camera
Name
Displays the name of the selected camera.
(This is a read-only field.)
B Image
Quality
Enables you to adjust the image resolution
and picture quality during viewing. Select
[Full] at all times.
C Frame Rate
This is the viewing frame rate.
Select [Unlimited] (default value; same as
live settings), [Medium] (25 % of the frame
rate), or [Low] (5 % of the frame rate),
depending on the frame rate specified in
[Live Settings] (
A
Page 56) on the
[Camera Settings] screen.
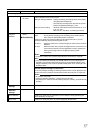
D Maintain
Image
Aspect
Ration
If this check box is selected, images will
not be stretched to fit the size of the
display position. Images will be displayed
in the aspect ratio (horizontal to vertical
ratio of the screen) that they have been
recorded.
E Update on
Motion
If this check box is selected, the camera’s
images will only be updated on the [Live]
screen when motion is detected.
F Sound on
Motion
Detection
Enables notification with a simple sound
when motion is detected while viewing
images from the camera on the [Live]
screen.
Always off Does not produce sound notification when
motion is detected.
Always on Notifies with a sound each time motion is
detected.
A
B
C
D
E
F
G
H
[Screen Setup] Screen