


52
Basic Operation
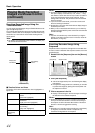
Recording Modes
Ⅵ
Recording Control Mode (
A
Page 53)
This mode performs recording according to the [Camera Record
Setting].
The [REC CONTROL] indicator lights up.
You can switch the recording control mode on or off by pressing and
holding the [REC CONTROL] button.
●
Set each camera to on/off using the [Scheduler...] settings
(
A
Page 53).
●
Specify the frame rate and conditions for starting recording in
[Camera Settings] (
A
Page 55).
Note :
●
During the interval that is set as offline in [Scheduler...],
recording will not be performed regardless of the [Camera
Settings].
●
The [REC CONTROL] button is
A
disabled
B
when the main menu
is displayed, when settings are being specified, and during
recording.
●
When there is an unconnected camera, it may take a while
before the [REC CONTROL] indicator lights up.
Memo :
●
Press the [REC/STOP] button to cancel the
A
recording control
mode
B
and enable manual recording mode.
●
Press and hold down the [REC/STOP] button to cancel all
A
recording modes
B
and stop recording.
●
Setting [Operate] to ON switches the mode automatically to the
A
recording control mode
B
. (When the
A
ON at startup
B
checkbox
of [Record Control] under [Unit Setting 1] of the main menu is
selected.)
Ⅵ
Manual Recording Mode
The manual recording mode executes recording from all cameras
regardless of the [Camera Record Setting]. Recording is executed
in the frame rate specified in [Recording Settings]
-
[Desired
framerate] of the [Camera Settings] screen.
Manual recording lets you start and stop recording on all cameras
by using the [REC/STOP] button. Press the [REC/STOP] button to
start recording. Press and hold down the [REC/STOP] button to
stop recording.
The [REC CONTROL] indicator lights up.
Ⅵ
[EXT REC IN] Signal Recording Mode
Recording starts on all cameras when the [EXT REC IN] terminal of
the rear input/output terminal is set to MAKE. Recording is executed
in the frame rate specified in [Recording Settings]
-
[Desired
framerate] of the [Camera Settings] screen.
Recording using [EXT REC IN] signals has priority over the
recording control mode or manual recording.
When recording by the [EXT REC IN] signals is complete, the
cameras return to the original recording mode.
Memo :
●
When recording using signals from the [EXT REC IN] terminal,
the light of the [REC CONTROL] indicator goes off, and the
[REC] indicator appears blinking.
●
Emergency recording lets you start and stop recording on all
cameras regardless of the [Scheduler...] settings or [Camera
Settings].
●
Pressing the [REC/STOP] button cancels recording by signals
from the [EXT REC IN] terminal and switches automatically to
the
A
manual recording mode
B
. The [REC] indicator also
changes from
A
blinking
B
to the
A
lit
B
mode.
●
Pressing and holding down the [REC/STOP] button cancels
recording by signals from the [EXT REC IN] terminal and stops
recording.
Ⅵ
Emergency Recording Mode
Recording starts on all cameras when a MAKE signal is detected by
the [EMERGENCY] terminal of the rear input/output terminal.
Recording is executed in the frame rate specified in [Recording
Settings]
-
[Desired framerate] of the [Camera Settings] screen.
Recording is only executed during the time specified in [Emergency
Record] of [Unit Setting 1] (
A
Page 70).
Emergency recording has priority over the [recording control mode]
or [manual recording] mode.
When emergency recording is complete, the cameras return to the
original recording mode.
Memo :
●
The [REC CONTROL] indicator goes off and the [REC] indicator
appears blinking during emergency recording.
●
Emergency recording lets you start and stop recording on all
cameras regardless of the [Scheduler...] settings or [Camera
Settings].
●
Pressing the [REC/STOP] button cancels emergency recording
and switches automatically to the
A
manual recording mode
B
.
The [REC] indicator also changes from
A
blinking
B
to the
A
lit
B
mode.
●
Press and hold down the [REC/STOP] button to cancel all
recording modes and stop recording.
Note :
●
When in the manual recording, [EXT REC IN] signal recording or
emergency recording mode, motion detection and event
recording settings are ignored.
Recording Operation During Power Failure
If a power failure occurs during recording, the system resumes
recording in the mode selected before the power failure after
recovery.
●
In the recording control mode, recording by a motion or event
does not resume unless another motion or event occurs after
recovery from the power failure.
●
The recording control mode returns to the status before the
power failure.
Note :
●
The recorded images may not be played back properly if they
are not archived (
A
Page 108) before the power failure.
●
It is recommended that an uninterruptible power supply (UPS)
be used to protect the hard disk from damage in the event of a
power failure. (
A
Page 136)
●
If a power failure occurs while formatting a hard disk or
archiving, subsequent operations may be affected even when a
UPS is connected.
Recording Camera Images
There are four different recording modes.
●
Recording Control Mode
●
Manual Recording Mode
●
EXT REC IN Signal Recording Mode
●
Emergency Recording Mode