


37
Recording – Basics / Enregistrement – Opérations de base
Effectuez d’abord les procédures décrites dans les
sections « Etape 1 » et « Etape 2 » (p. 24 à 33).
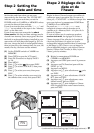
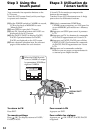
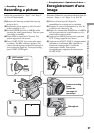
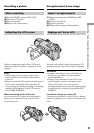
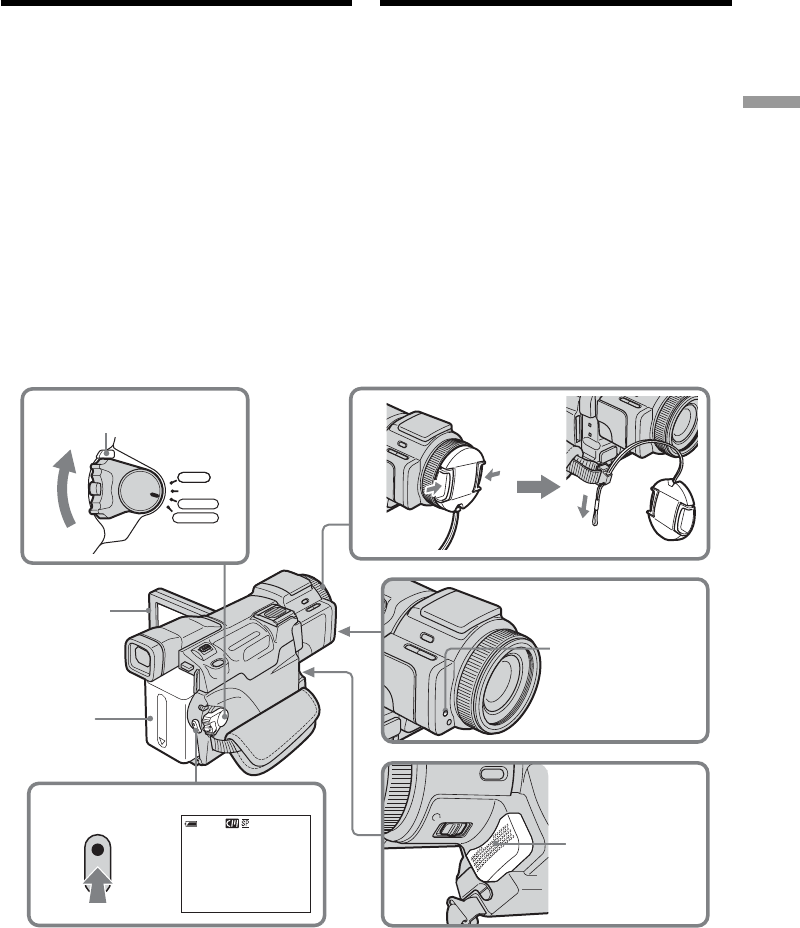
(1)Enlevez le bouchon de l’objectif et
immobilisez-le en tirant sur la cordelette.
(2)Préparez la source d’alimentation (p. 24 à 30)
et insérez une cassette (p. 16).
(3)Réglez le commutateur POWER sur CAMERA
tout en appuyant sur le petit bouton vert. Le
caméscope se met en pause.
(4)Appuyez sur OPEN pour ouvrir le panneau
LCD. L’image apparaît sur l’écran.
(5)Appuyez sur START/STOP. L’enregistrement
commence. L’indicateur REC apparaît. Le
témoin de tournage situé à l’avant du
caméscope s’allume. Pour arrêter
l’enregistrement, appuyez de nouveau sur
START/STOP.
Follow the procedures in “Step 1” and “Step 2”
(p. 24 to 33) beforehand.
(1)Remove the lens cap and pull the lens cap
string to fix it.
(2)Prepare the power source (p. 24 to 30) and
insert a cassette (p. 12).
(3)Set the POWER switch to CAMERA while
pressing the small green button. This sets your
camcorder to standby.
(4)Press OPEN to open the LCD panel. The
picture appears on the screen.
(5)Press START/STOP. Your camcorder starts
recording. The REC indicator appears. The
camera recording lamp located on the front of
your camcorder lights up. To stop recording,
press START/STOP again.
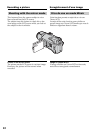
— Recording – Basics —
Recording a picture
5
2
4
50min
REC
0:00:01
3
POWER
VCR
MEMORY
CAMERA
OFF(CHG)
1
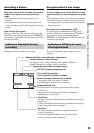
LOCK switch/
Commutateur LOCK
Microphone
Camera recording
lamp/
Témoin de
tournage du
caméscope
— Enregistrement – Opérations de base —
Enregistrement d’une
image