


Notice!
Fasteners are not supplied with the Roof Parapet Mount Kit since it depends on the material
to which it is attached. The material must accommodate a minimum pull out strength of 275
kg (600 lbs). For example, 19 mm (3/4 inch) minimum for plywood. Fasteners can include
bolts, studs, or lag bolts. All fasteners must be made of corrosion-resistant stainless steel,
with a diameter of 10 mm (3/8 inch).
All bolts must fully extend through the mounting surface and be secured with a flat washer,
lock washer and a nut. All studs must be anchored to concrete or welded to a steel backing
plate. Anchor bolts can be used for blind structures where there is no access to the rear.
3. Apply a weatherproof sealant around each fastener hole at the mounting surface.
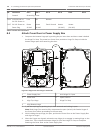
4. Attach the Parapet Wall Bracket using at least six (6) stainless steel fasteners, three (3)
on each side (the bracket has eight (8) holes). Be careful not to over tighten the fasteners
because it may strip the threads. If attaching the parapet mount to a flat roof, attach the
optional LTC 9230/01 Roof Mount Plate to the roof and then attach the Parapet Wall
Bracket to the Roof Mount Plate.
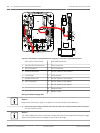
5. Insert the Parapet Pipe Arm into the mounting bracket until it bottoms in the bracket.
6. Remove the End Cap from the front of the arm and feed the video, control, and power
wires up through the bottom of the pipe arm and out the front end.
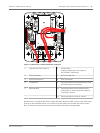
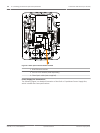
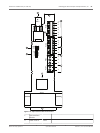
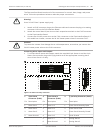
Figure 8.8: VGA-ROOF-MOUNT
1
End Cap with O-ring
2 Parapet Pipe Arm
3 1/4-20 SS Cap Screw
4 Down Pipe
5 10-24 SS Pan Head Screw
7. Fold the video, control, and power wires back at the front end of the arm and route them
down and out through the Down Pipe. Then replace the End Cap.
8. Wrap at least five layers of Teflon tape around the Down Pipe threads.
9. Apply the supplied thread sealant to the Down Pipe threads:
Make sure all surfaces are clean and dry.
Apply a bead of sealant completely around the leading threads of the male fitting.
Force the adhesive into the threads to thoroughly fill all voids.
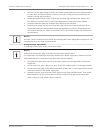
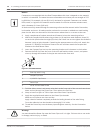
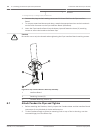
10. Thread the Dome Cap onto the down pipe and tighten securely. See the illustration
below.
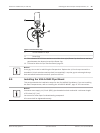
!
Warning!
You must thread the Dome Cap onto the Down Pipe until it is tight. Failure to do so can result
in damage, serious injury, or death.
48 en | Installing the Roof Parapet and Pipe Mounts AutoDome 7000 Series (IP and HD)
2013.07 | 1.2.2 | F.01U.283.679 Operation Manual Bosch Security Systems