


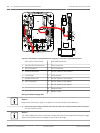
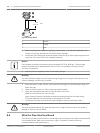
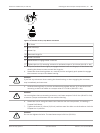

5 in.
12.7 cm
min.
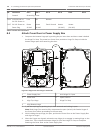
Figure 8.10: Pipe Mount
1
Gasket
2 Flange
3 Cap
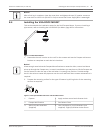
1. Before installing the Top-Mounting Flange, ensure there is an adequate opening in the
ceiling or mounting structure for the wires to pass through.
2. Secure the pipe Flange with supplied gasket to the ceiling or other supporting structure
using four (4) 10-mm (3/8-inch) diameter fasteners.
Notice!
Each fastener must have a minimum pullout strength of 275 kg (600 lbs). The mounting
material must be able to withstand this pull-out force. For example, 19-mm (3/4-inch)
minimum for plywood.
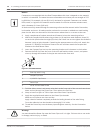
3. Attach pipe (not supplied) to the Top-mounting Flange.
!
Warning!
You must thread the pipe onto the Top-mounting Flange until it is tight. Failure to do so can
result in damage, serious injury or death.
4. Route the power, video, control, and alarm wires through the Top-Mounting Flange and
down the pipe.
5. Wrap at least five layers of Teflon tape around the threads.
6. Apply the supplied thread sealant to the threads on the Pipe.
Make sure all surfaces are clean and dry.
Apply a bead of sealant completely around the leading threads of the male fitting.
Force the adhesive into the threads to thoroughly fill all voids.
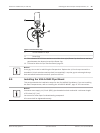
7. Thread the Pipe Cap onto the down pipe and tighten securely to prevent leaks.
!
Warning!
You must thread the Dome Cap onto the pipe until it is tight. Failure to do so can result in
damage or serious injury or death.
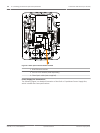
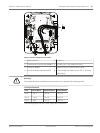
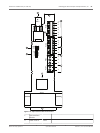
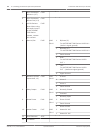
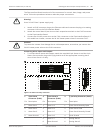
Wire the Pipe Interface Board
This section provides instructions for connecting wires and cables to the Pipe Interface Board,
as illustrated below. Refer to the Connection, page 70 chapter for cable and wiring
recommendations and specifications.
8.6
50 en | Installing the Roof Parapet and Pipe Mounts AutoDome 7000 Series (IP and HD)
2013.07 | 1.2.2 | F.01U.283.679 Operation Manual Bosch Security Systems