


123
1
Camera Basics
2
Auto Mode /
Hybrid Auto Mode
3
Other Shooting Modes
4
P Mode
5
Tv, Av, M, and C Mode
6
Playback Mode
7
Wi-Fi Functions
8
Setting Menu
9
Accessories
10
Appendix
Index
Before Use
Basic Guide
Advanced Guide
● You can also congure this setting by touching [ ][ ] on the
screen in step 3.
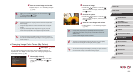
Correcting Red-Eye
Still Images
Movies
Automatically corrects images affected by red-eye. You can save the
corrected image as a separate le.
1
Choose [Red-Eye Correction].
zPress the [ ] button, and then
choose [Red-Eye Correction] on the [ ]
tab (
=
30).
2
Choose an image.
zPress the [ ][ ] buttons or turn the [ ]
dial to choose an image.
3
Correct the image.
zPress the [ ] button.
zRed-eye detected by the camera is now
corrected, and frames are displayed
around corrected image areas.
zEnlarge or reduce images as needed.
Follow the steps in “Magnifying Images”
(
=
112).
4
Save as a new image and review.
zPress the [ ][ ][ ][ ] buttons or turn
the [ ] dial to choose [New File], and
then press the [ ] button.
zThe image is now saved as a new le.
zFollow step 5 in “Resizing Images”
(
=
120).
Correcting Image Brightness (i-Contrast)
Still Images
Movies
Excessively dark image areas (such as faces or backgrounds) can be
detected and automatically adjusted to the optimal brightness. Insufcient
overall image contrast is also automatically corrected, to make subjects
stand out better. Choose from four correction levels, and then save the
image as a separate le.
1
Choose [i-Contrast].
zPress the [ ] button, and then
choose [i-Contrast] on the [ ] tab
(
=
30).
2
Choose an image.
zPress the [ ][ ] buttons or turn the [ ]
dial to choose an image, and then press
the [ ] button.
3
Choose an option.
zPress the [ ][ ] buttons or turn the [ ]
dial to choose an option, and then press
the [ ] button.
4
Save as a new image and review.
zFollow steps 4 – 5 in “Resizing Images”
(
=
120).
● For some images, correction may be inaccurate or may cause
images to appear grainy.
● Images may look grainy after repeated editing using this function.
● RAW images cannot be edited this way.
● If [Auto] does not produce the expected results, try correcting
images using [Low], [Medium], or [High].