


65
1
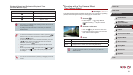
Camera Basics
2
Auto Mode /
Hybrid Auto Mode
3
Other Shooting Modes
4
P Mode
5
Tv, Av, M, and C Mode
6
Playback Mode
7
Wi-Fi Functions
8
Setting Menu
9
Accessories
10
Appendix
Index
Before Use
Basic Guide
Advanced Guide
4
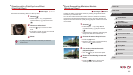
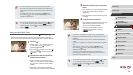
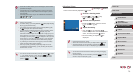
Join the subjects in the shooting
area and look at the camera.
zAfter the camera detects a new face, the
lamp blinking and self-timer sound will
speed up. (When the ash res, the lamp
will remain lit.) About two seconds later,
the camera will shoot.
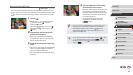
zTo cancel shooting after you have
triggered the self-timer, press the
[
] button.
● Even if your face is not detected after you join the others in the
shooting area, the camera will shoot about 15 seconds later.
● To change the number of shots, press the [
][ ] buttons
after choosing [
] in step 1. [Blink Detection] (
=
51) is only
available for the nal shot.
● You can also choose the shooting mode by choosing [ ] in steps
1 – 2 of “Specic Scenes” (
=
55), touching [ ] to access
the setting screen, touching [
], and then touching the same
option or [
].
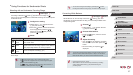
Using the Face Self-Timer
Still Images
Movies
The camera will shoot about two seconds after detecting that the face of
another person (such as the photographer) has entered the shooting area
(
=
84). This is useful when including yourself in group photos or similar
shots.
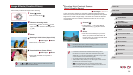
1
Choose [ ].
zFollow steps 1 – 2 in “Specic Scenes”
(
=
55) and choose [ ], and then
press the [ ] button.
zPress the [
][ ] buttons or turn the [ ]
dial to choose [ ], and then press the
[ ] button.
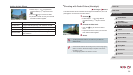
2
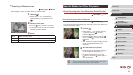
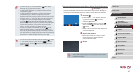
Compose the shot and press the
shutter button halfway.
zMake sure a green frame is displayed
around the face you focus on and white
frames around other faces.
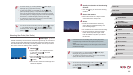
3
Press the shutter button all the way
down.
zThe camera now enters shooting standby
mode, and [Look straight at camera to
start count down] is displayed.
zThe lamp blinks and the self-timer sound
is played.