


138
1
Camera Basics
2
Auto Mode /
Hybrid Auto Mode
3
Other Shooting Modes
4
P Mode
5
Tv, Av, M, and C Mode
6
Playback Mode
7
Wi-Fi Functions
8
Setting Menu
9
Accessories
10
Appendix
Index
Before Use
Basic Guide
Advanced Guide
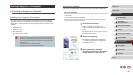
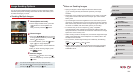
Sending Images to a Registered Web Service
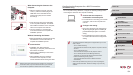
Registering Web Services
Use a smartphone or computer to add to the camera Web services that
you want to use.
● A smartphone or computer with a browser and Internet connection is
required to complete camera settings for CANON iMAGE GATEWAY
and other Web services.
● Check the CANON iMAGE GATEWAY website for details on browser
(Microsoft Internet Explorer, etc.) requirements, including settings and
version information.
● For information on countries and regions where CANON iMAGE
GATEWAY is available, visit the Canon website (http://www.canon.
com/cig/).
● You must have an account with Web services other than CANON
iMAGE GATEWAY if you desire to use them. For further details, check
the websites for each Web service you want to register.
● Separate ISP connection and access point fees may be applicable.
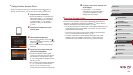
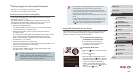
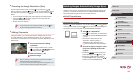
● To determine the access point password, check on the access
point itself or refer to the user manual.
● Up to 16 access points will be displayed. If no access points are
detected even after you choose [Refresh] in step 2 to update the
list, choose [Manual Settings] in step 2 to complete access point
settings manually. Follow on-screen instructions and enter an
SSID, security settings, and a password.
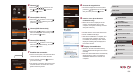
● When you use an access point that you have already connected
to for connecting to another device, [*] is displayed for the
password in step 3. To use the same password, choose [Next]
(either press the [
][ ] buttons or turn the [ ] dial) and press
the [
] button.
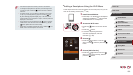
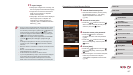
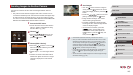
Previous Access Points
You can reconnect to any previous access points automatically by
following step 4 in “Using WPS-Compatible Access Points” (
=
135).
● To reconnect to the access point, conrm that the target device is
already connected to it, and then follow the procedure from step 8 in
“Using WPS-Compatible Access Points” (
=
135).
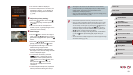
● To switch access points, choose [Switch Network] on the screen
displayed after connection, and then either follow the procedure in
“Using WPS-Compatible Access Points” (
=
135) from step 5 or the
procedure in “Connecting to Listed Access Points” (
=
137) from
step 2.