


161
1
Camera Basics
2
Auto Mode /
Hybrid Auto Mode
3
Other Shooting Modes
4
P Mode
5
Tv, Av, M, and C Mode
6
Playback Mode
7
Wi-Fi Functions
8
Setting Menu
9
Accessories
10
Appendix
Index
Before Use
Basic Guide
Advanced Guide
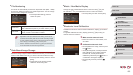
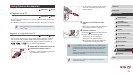
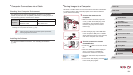
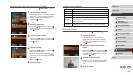
zOn the camera, open the terminal cover
and insert the cable plug fully into the
camera terminal.
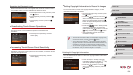
3
Turn the TV on and switch to video
input.
zSwitch the TV input to the video input you
connected the cable to in step 2.
4
Turn the camera on.
z Press the [ ] button to turn the camera on.
zImages from the camera are now
displayed on the TV. (Nothing is
displayed on the camera screen.)
zWhen nished, turn off the camera and
TV before disconnecting the cable.
● It is not possible to connect the USB cable or an optional stereo
AV cable at the same time as an HDMI cable. Forcing the cables
into the camera at the same time may damage the camera or
cables.
● Touch-screen operations are not supported while the camera is
connected to a television.
● Camera operating sounds are not played while the camera is
connected to an HDTV.
Using Optional Accessories
Still Images
Movies
Playback on a TV
Still Images
Movies
By connecting the camera to a TV, you can view your shots on the larger
screen of the TV.
For details on connection or how to switch inputs, refer to the TV manual.
● Some information may not be displayed when viewing images on
a TV (
=
180).
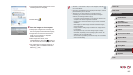
Playback on a High-Denition TV
Still Images
Movies
You can view your shots on a TV by connecting the camera to an HDTV
with a commercially available HDMI cable (not exceeding 2.5 m, with
a Type D terminal on the camera end). Movies shot at a resolution of
[ ], [ ], or [ ] can be viewed in high denition.
1
Make sure the camera and TV are off.
2
Connect the camera to the TV.
zOn the TV, insert the cable plug fully into
the HDMI input as shown.