


129
1
Camera Basics
2
Auto Mode /
Hybrid Auto Mode
3
Other Shooting Modes
4
P Mode
5
Tv, Av, M, and C Mode
6
Playback Mode
7
Wi-Fi Functions
8
Setting Menu
9
Accessories
10
Appendix
Index
Before Use
Basic Guide
Advanced Guide
6
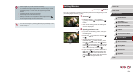
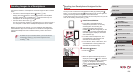
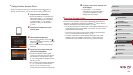
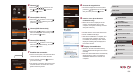
Choose a smartphone to connect to.
zChoose the smartphone (either by
pressing the [ ][ ] buttons or by turning
the [ ] dial), and then press the [ ]
button.
zAfter a connection is established with
the smartphone, the smartphone name
is displayed on the camera. (This screen
will close in about one minute.)
7
Import images.
zUse the smartphone to import images
from the camera to the smartphone.
zUse the smartphone to end the
connection; the camera will automatically
turn off.
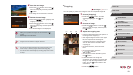
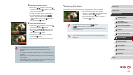
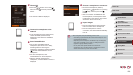
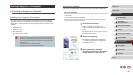
● When using NFC, keep the following points in mind.
- Avoid strong impact between the camera and smartphone. This
may damage the devices.
- Depending on the smartphone, the devices may not recognize
each other immediately. In this case, try holding the devices
together in slightly different positions.
- Do not place other objects between the camera and
smartphone. Also, note that camera or smartphone covers or
similar accessories may block communication.
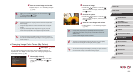
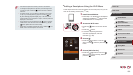
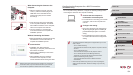
3
Choose [ ].
zPress the [ ][ ] buttons or turn the [ ]
dial to choose [ ], and then press the [ ]
button.
zThe camera’s SSID is displayed.
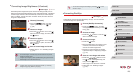
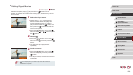
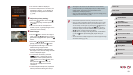
4
Connect the smartphone to the
network.
zIn the smartphone’s Wi-Fi setting menu,
choose the SSID (network name)
displayed on the camera to establish a
connection.
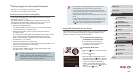
5
Start CameraWindow.
zFor an NFC-compatible Android
smartphone (OS version 4.0 or later),
activating NFC and touching the
smartphone against the camera’s N-Mark
( ) will start CameraWindow on the
smartphone.
zFor other smartphones, start
CameraWindow on the smartphone.
zAfter the camera recognizes the
smartphone, a device selection screen is
displayed.